

Traveling is fun and we all have a lot of places we want to visit, but rarely do we have time to do it all at once. That’s what bucket lists are for! How can we create a custom mapping app that we can show all of our the destinations on our bucket list?
Note: As of July 2022, GraphCMS is now Hygraph.
- What are we going to build?
- Step 1: Creating a new app with Gatsby Starter Leaflet
- Step 2: Creating and managing a list of travel locations with GraphCMS
- Step 3: Querying our GraphCMS location data with Gatsby and GraphQL
- Step 4: Creating a bucket list of destinations and adding them to the map
- What else other features can we add to our app?
- Want to learn more about maps?
What are we going to build?
We’re going to build a mapping app with Gatsby managed by a CMS that will both display markers on a map and show our locations in a simple text-based list for our bucket list locations.
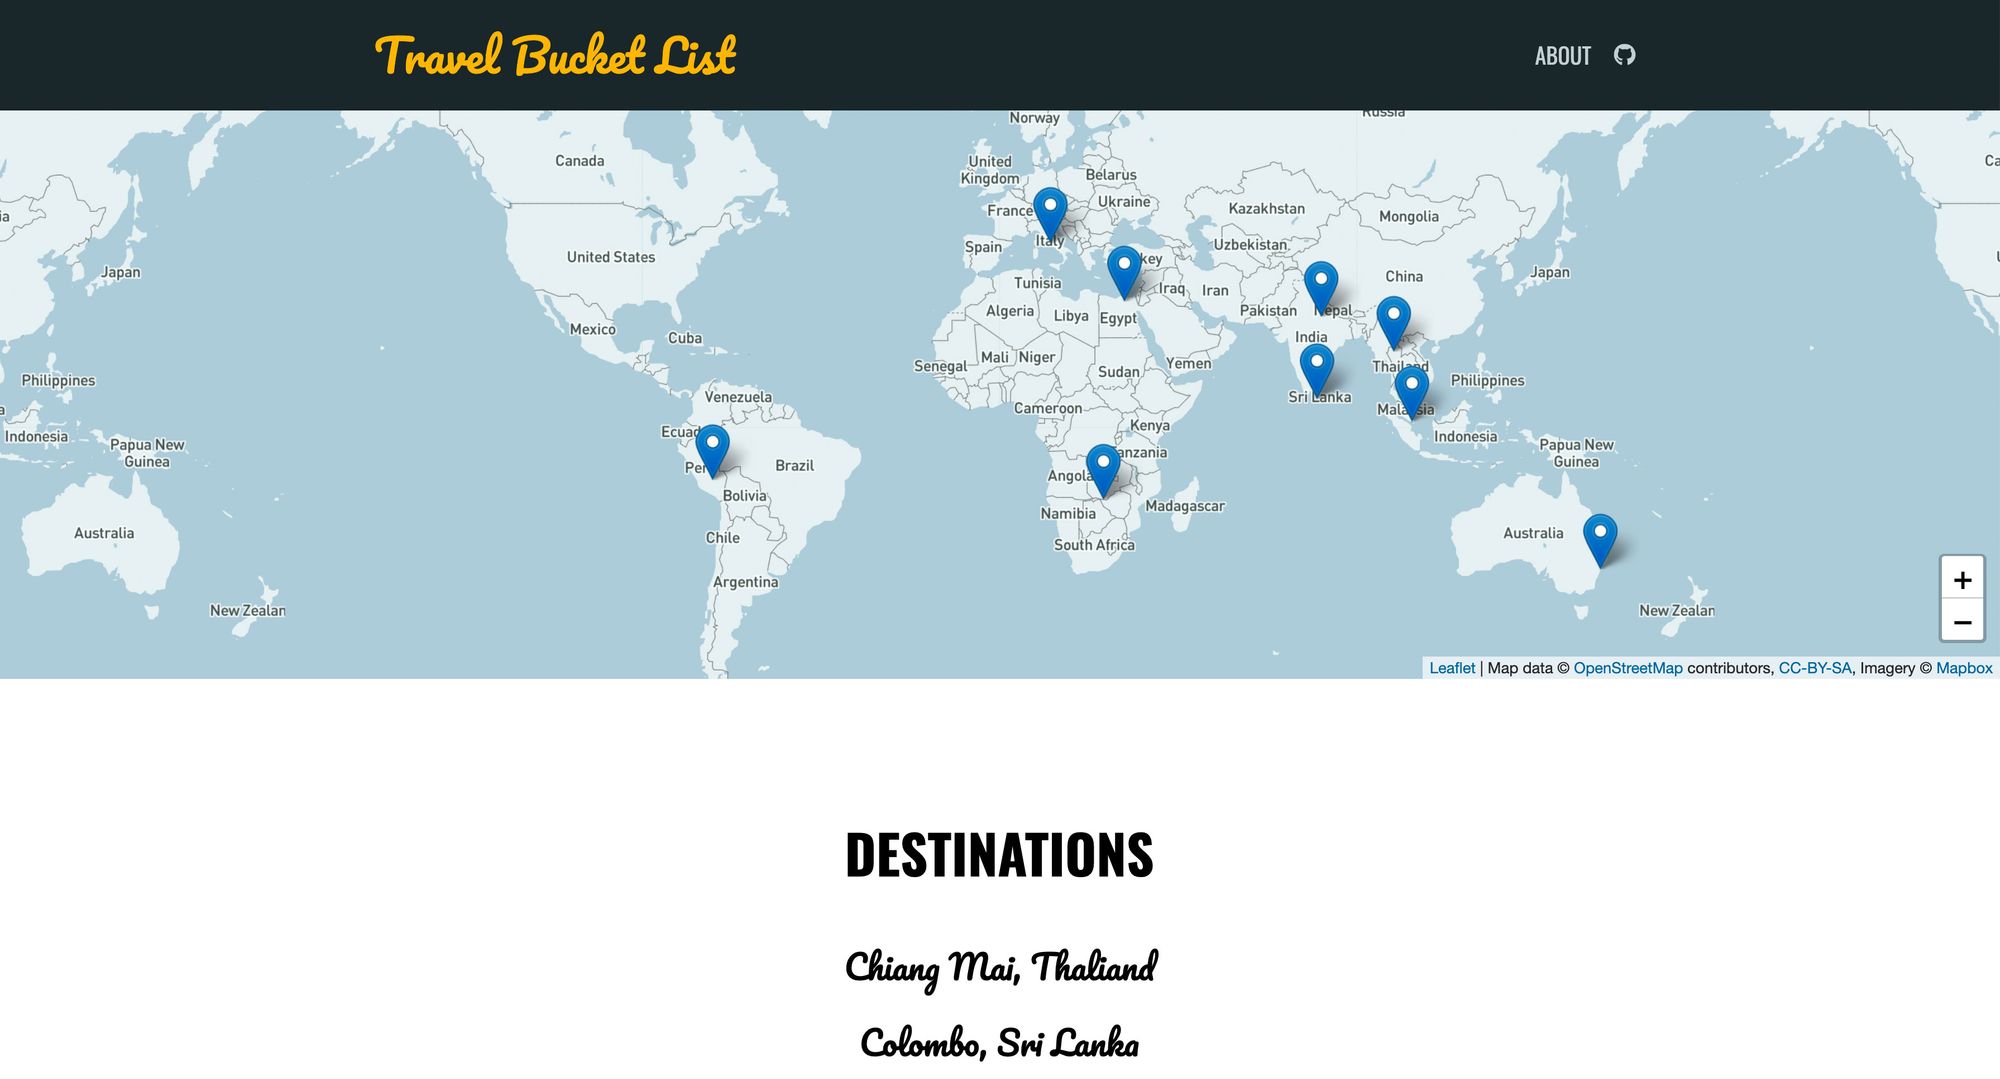
We’ll spin up the app with a Gatsby Starter for Leaflet and then we’ll use GraphCMS to create and manage the list of locations for our map!
Woah, a mapping app?
Yup. If you haven't played with maps before, don't be discouraged! It's not as bad as you probably think. If you'd rather start with mapping basics, you can read more about how mapping works first.
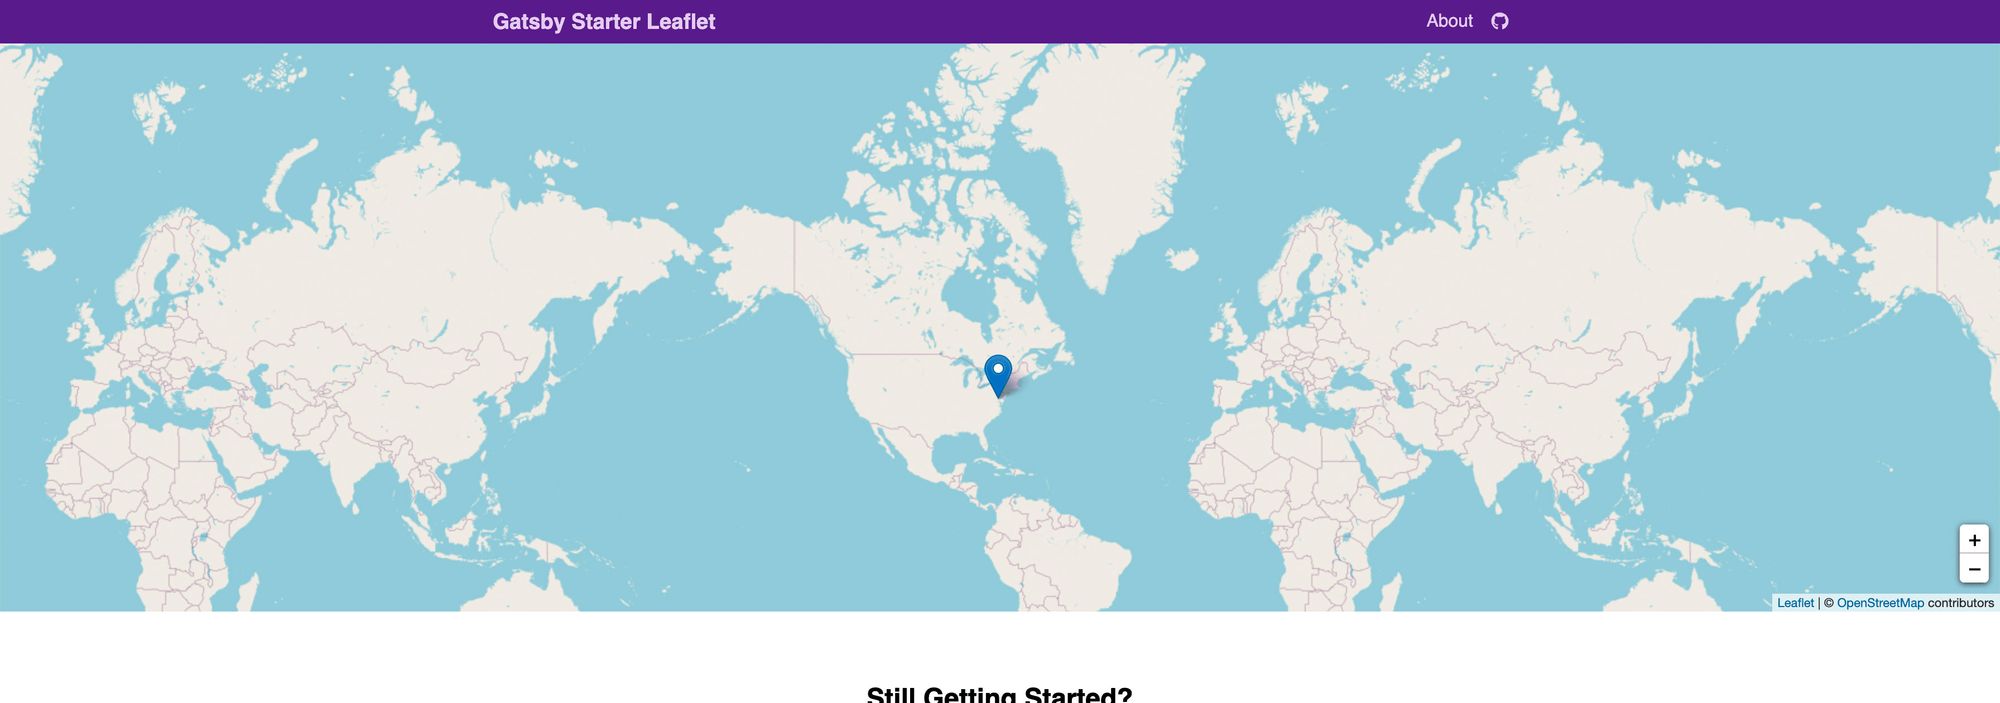
Step 1: Creating a new app with Gatsby Starter Leaflet
We’ll start off with Gatsby Starter Leaflet. This is going to give us a basic React application with our mapping tools already built in.
Creating a new Gatsby app with Gatsby Starter Leaflet
To get started, navigate to where you want to create your new app and run:
gatsby new my-travel-bucket-list https://github.com/colbyfayock/gatsby-starter-leaflet
Note: you can replace my-travel-bucket-list with whatever you want. This will be used to create the new folder for the app.
Once you run that, Gatsby will pull down the Starter and install the dependencies. After it’s complete, navigate to that directory and run the development command:
cd my-travel-bucket-list
yarn develop
# or
npm run develop
Once it’s finished location, your app should be ready to go!
Cleaning our some demo code
Because we’re using a Starter, it has a little bit of demo code. Let’s clean that out to avoid any confusion.
Open up the src/pages/index.js file.
First, remove everything inside of mapEffect except the first line and set up an alias for leafletElement to map:
async function mapEffect({ leafletElement: map } = {}) {
  if ( !map ) return;
}
With that gone, we can remove the markerRef definition at the top of the IndexPage component, remove the ref={markerRef} prop from our <Marker> component, and the useRef import next to React.
Now, we can remove all of the variables that start with popup and time, including:
- timeToZoom
- timeToOpenPopupAfterZoom
- timeToUpdatePopupAfterZoom
- popupContentHello
- popupContentGatsby
Lastly, you can remove all of the following lines:
import L from 'leaflet';
...
import { promiseToFlyTo, getCurrentLocation } from 'lib/map';
...
import gatsby_astronaut from 'assets/images/gatsby-astronaut.jpg';
...
const ZOOM = 10;
Once done, we should be ready to go with a basic app with a map!
Step 2: Creating and managing a list of travel locations with GraphCMS
Creating a GraphCMS account
To get started with GraphCMS, you’ll need an account. I’m not going to walk you through this part, but the good news is they have a generous free tier that makes it easy to sign up for us to use for our demo!
Alternatively, if you already have an account, you can make sure you’re logged in.
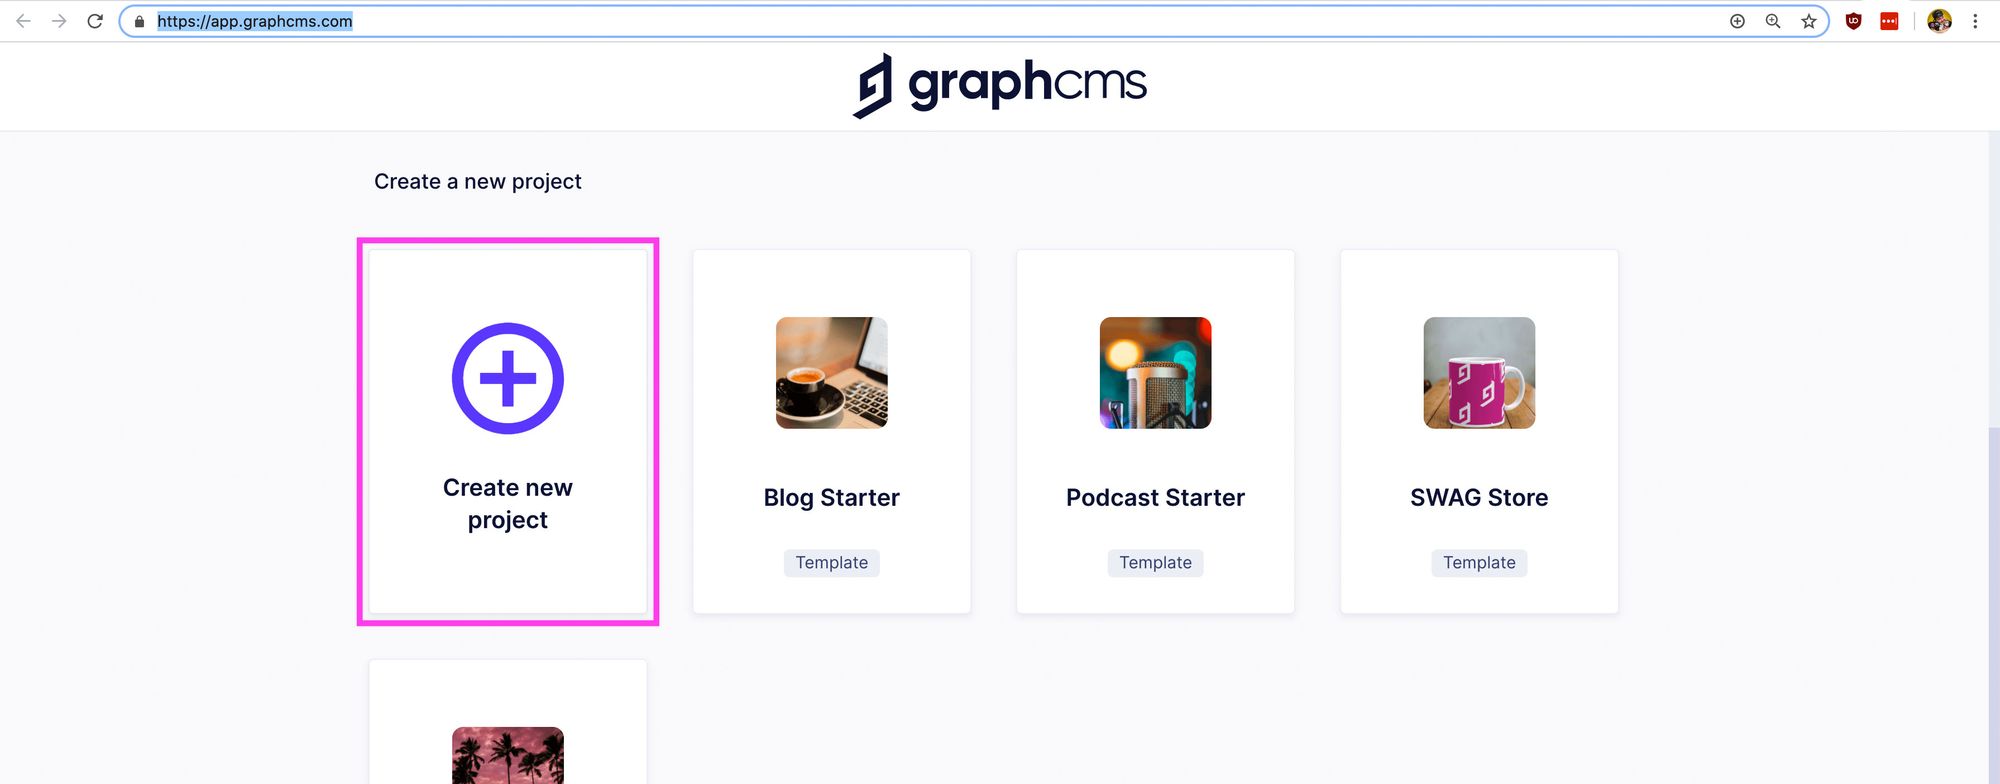
Creating a new GraphCMS project
Once logged in, we’ll want to create a new project. We’re going to create one manually, so once at the GraphCMS Dashboard, select Create new project:
Here, you can enter whatever you’d like for the Name and Description such as:
- Name: My Travel Bucket List
- Description: The locations that I want to travel to some day!
Below that you’ll see a map where you’ll select a Region. This is where your database data will live, so while it probably doesn’t matter too much for our purposes, you can choose the one that’s closest to you.
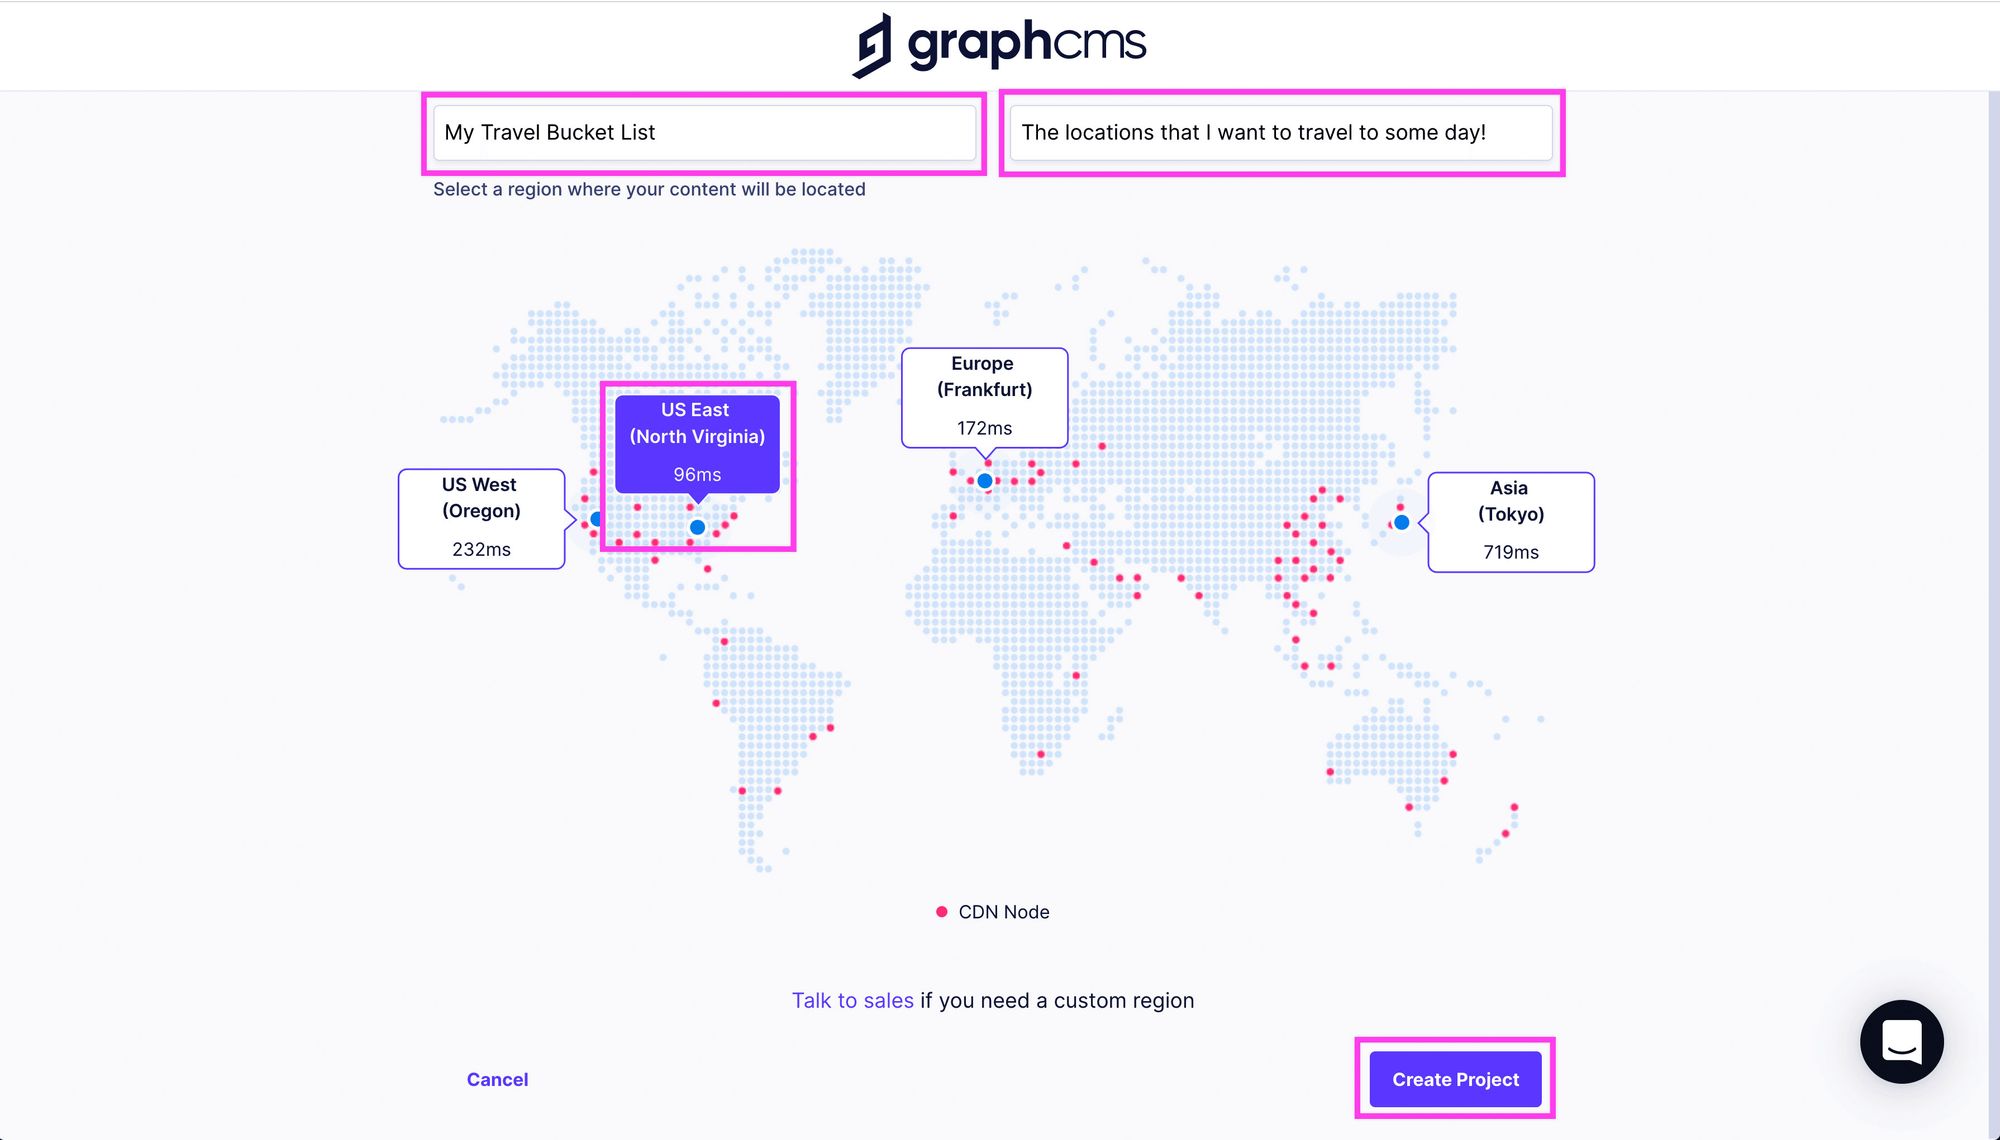
After you select your options, go ahead and click Create Project.
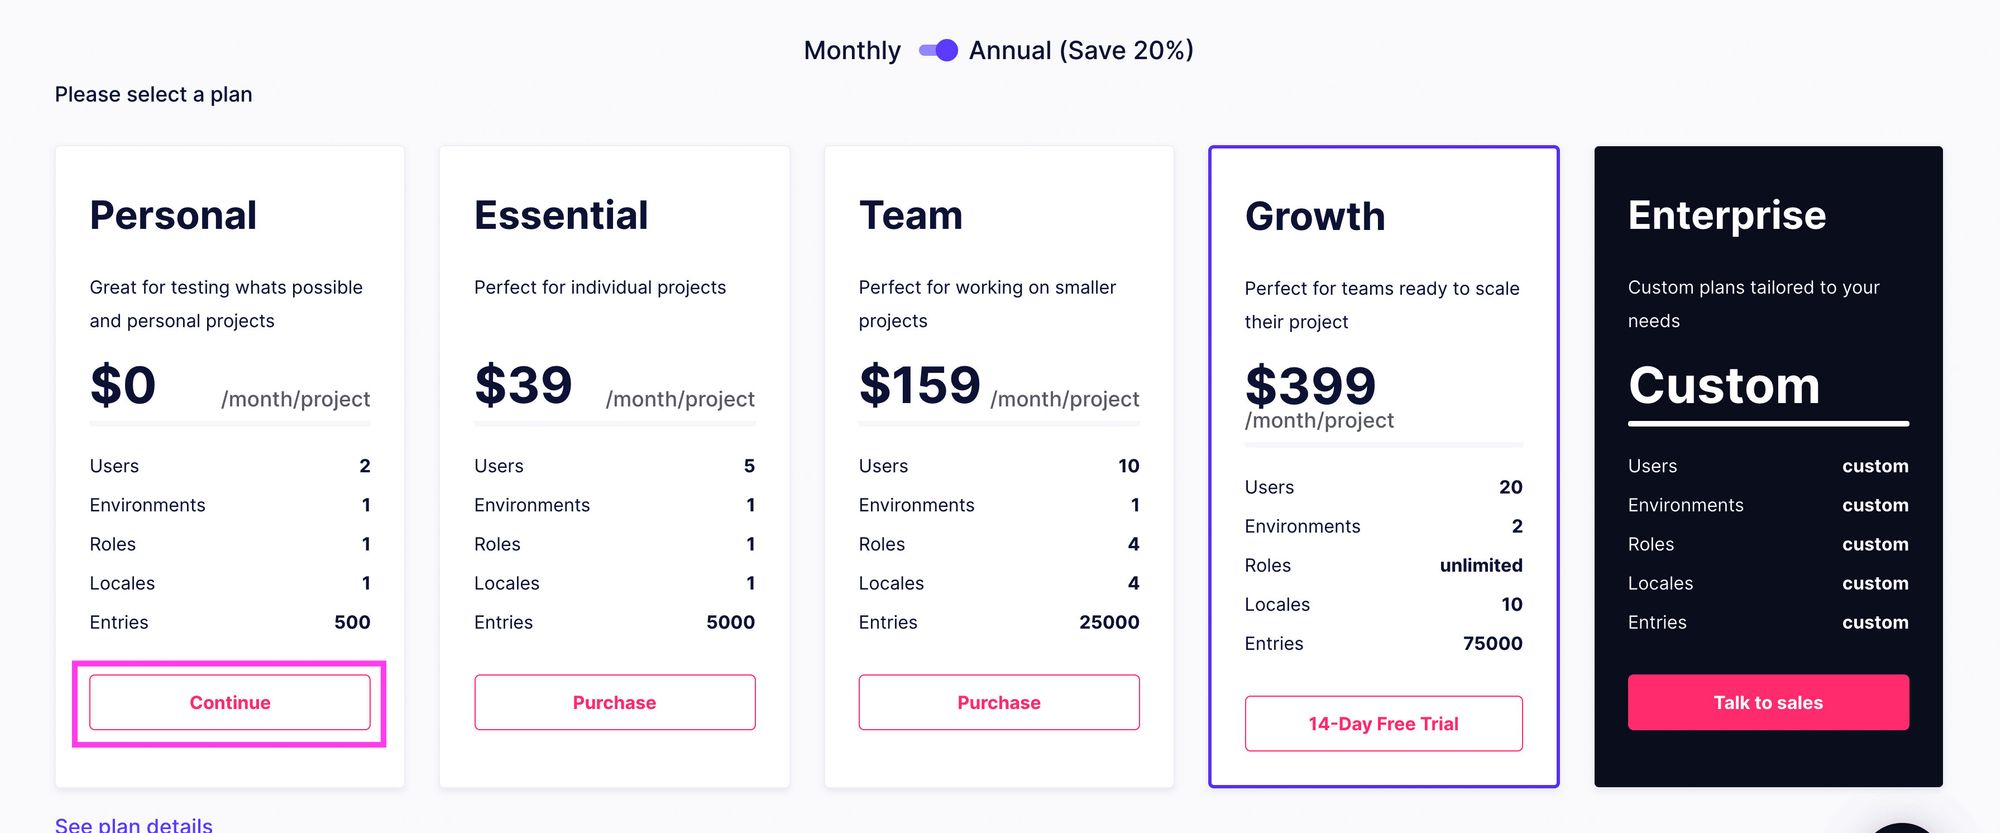
Next, you’ll be presented with billing options. Since we’re just creating a demo, under Personal select Continue at which point we’ll be dropped into our new GraphCMS project dashboard.
Creating a new Content Model Schema with GraphCMS
In GraphCMS, a Content Model refers to a specific type of data that has specific properties associated with it. In our case, our Model will be a Destination, which will be defined by a Name and a Location.
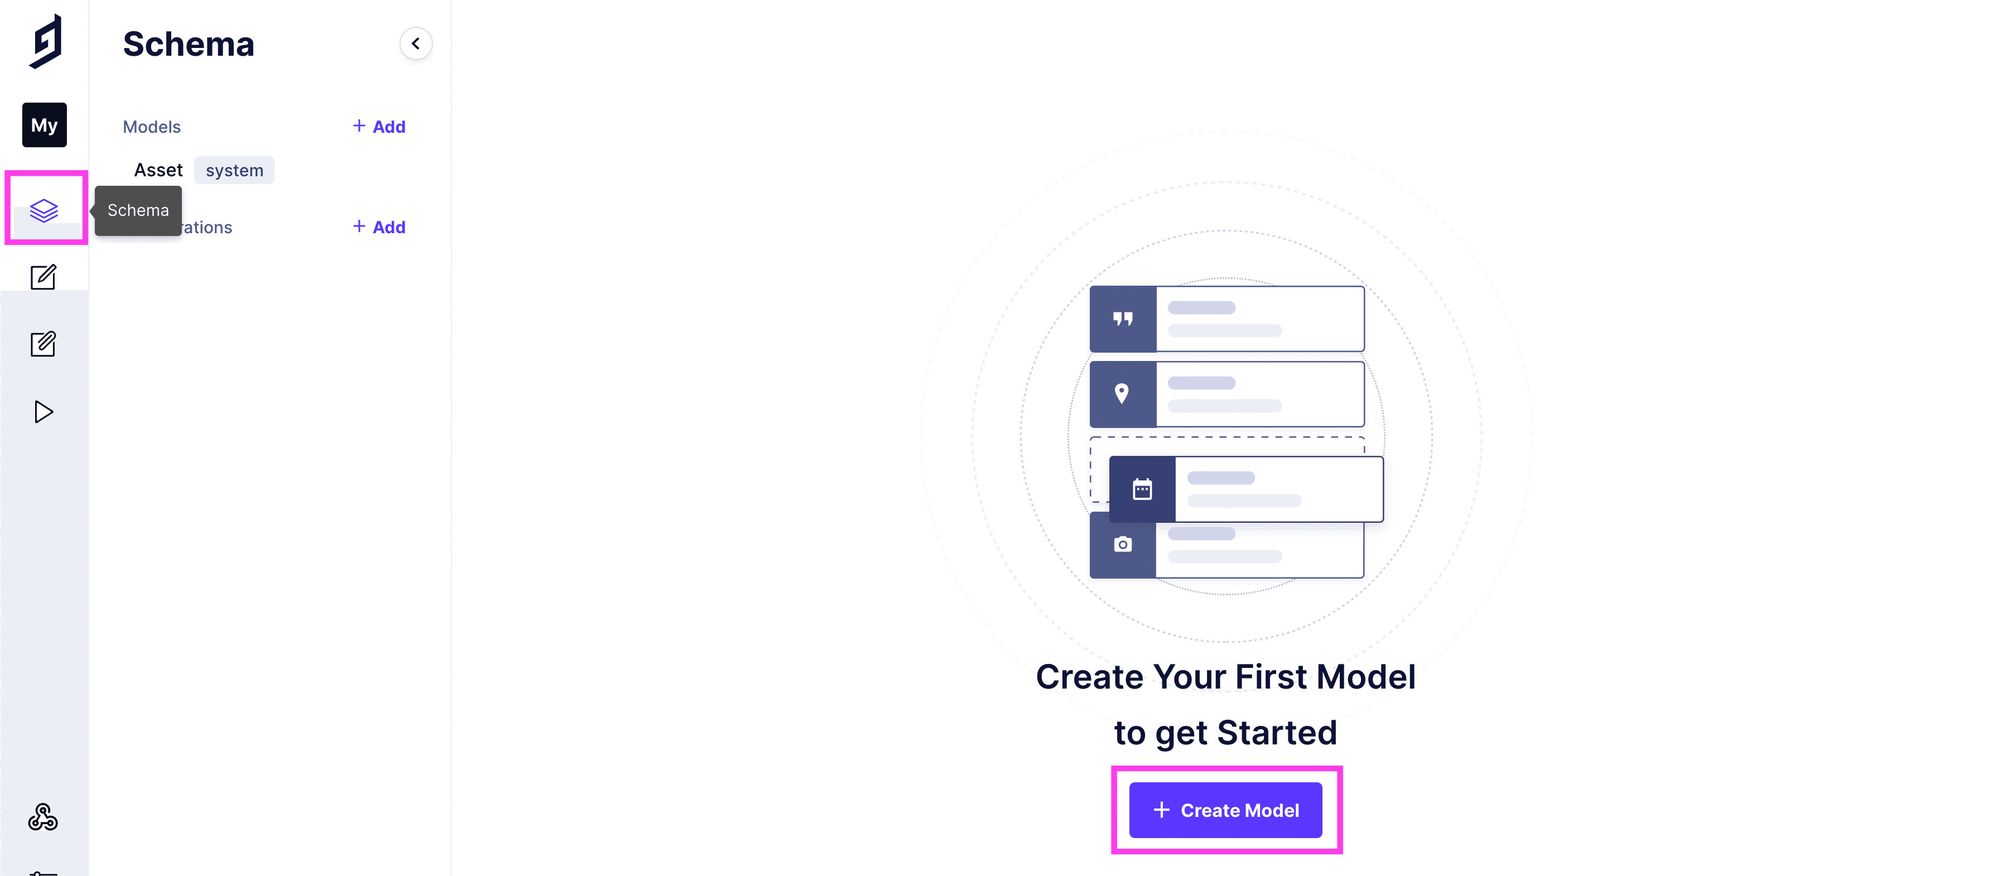
First, navigate to the Schema section of GraphCMS in the left sidebar and select Create Model.
Once selected, you’ll see a popup that asks for a bit more information. Here, you can type in “Destination” as the Display Name, which will also fill in most of the other fields. We’ll leave those as is.
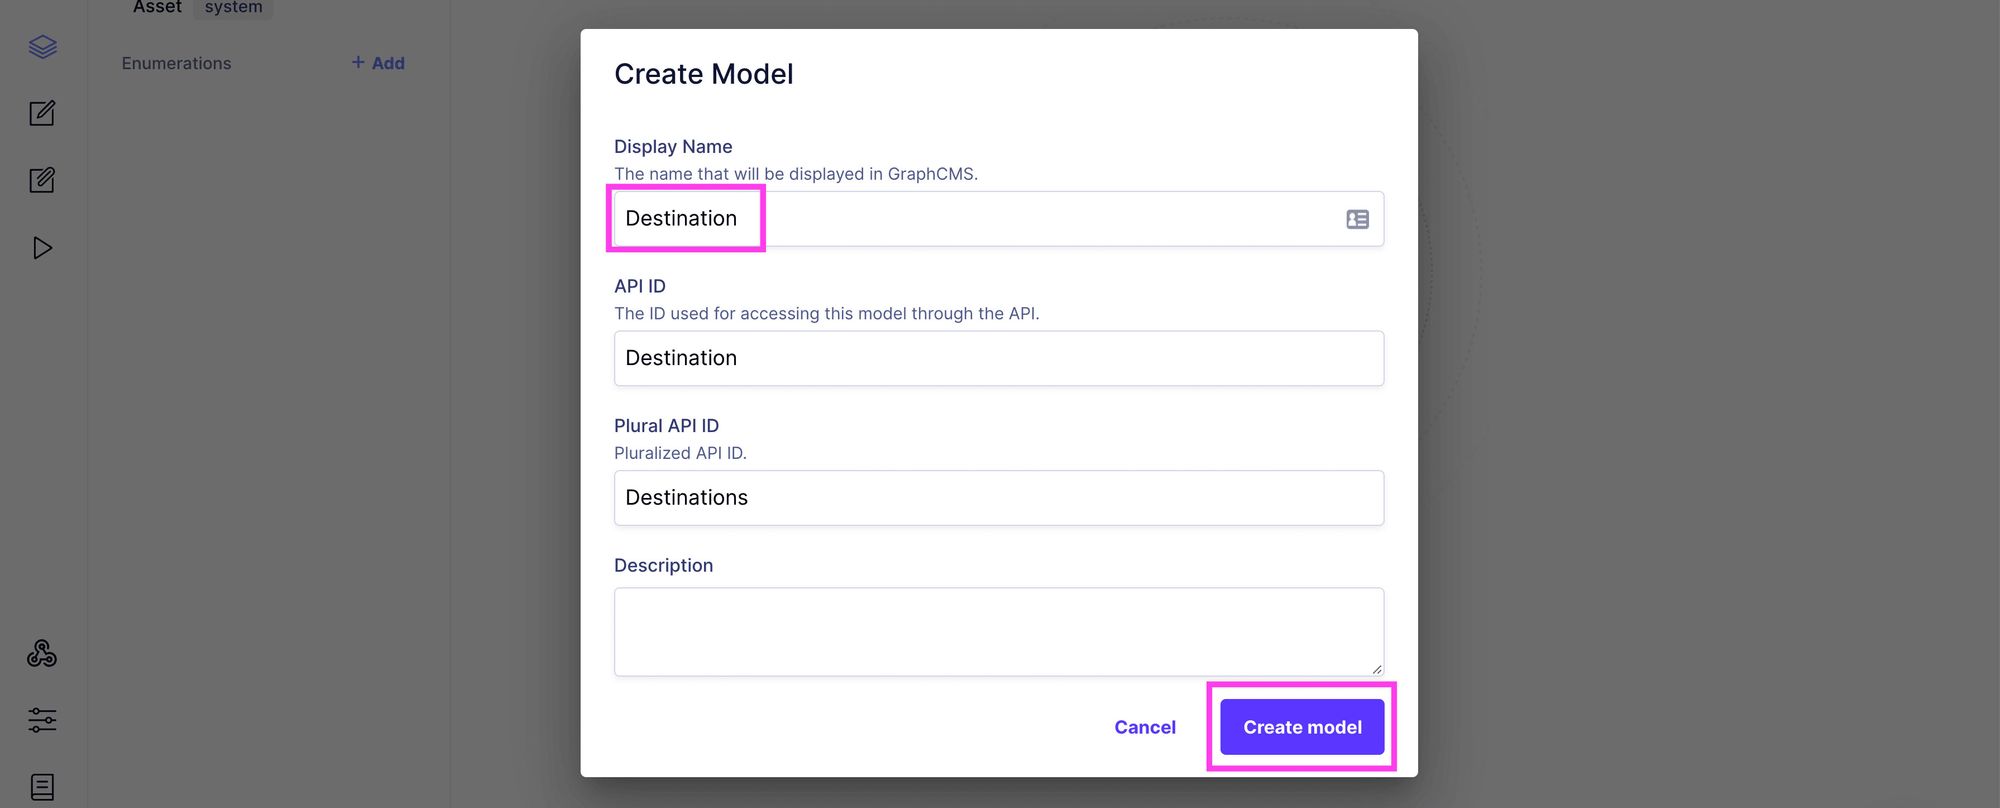
Feel free to add a description if you’d like, but it’s not required. Then select Create model.
Now that we have our Model, we need our properties.
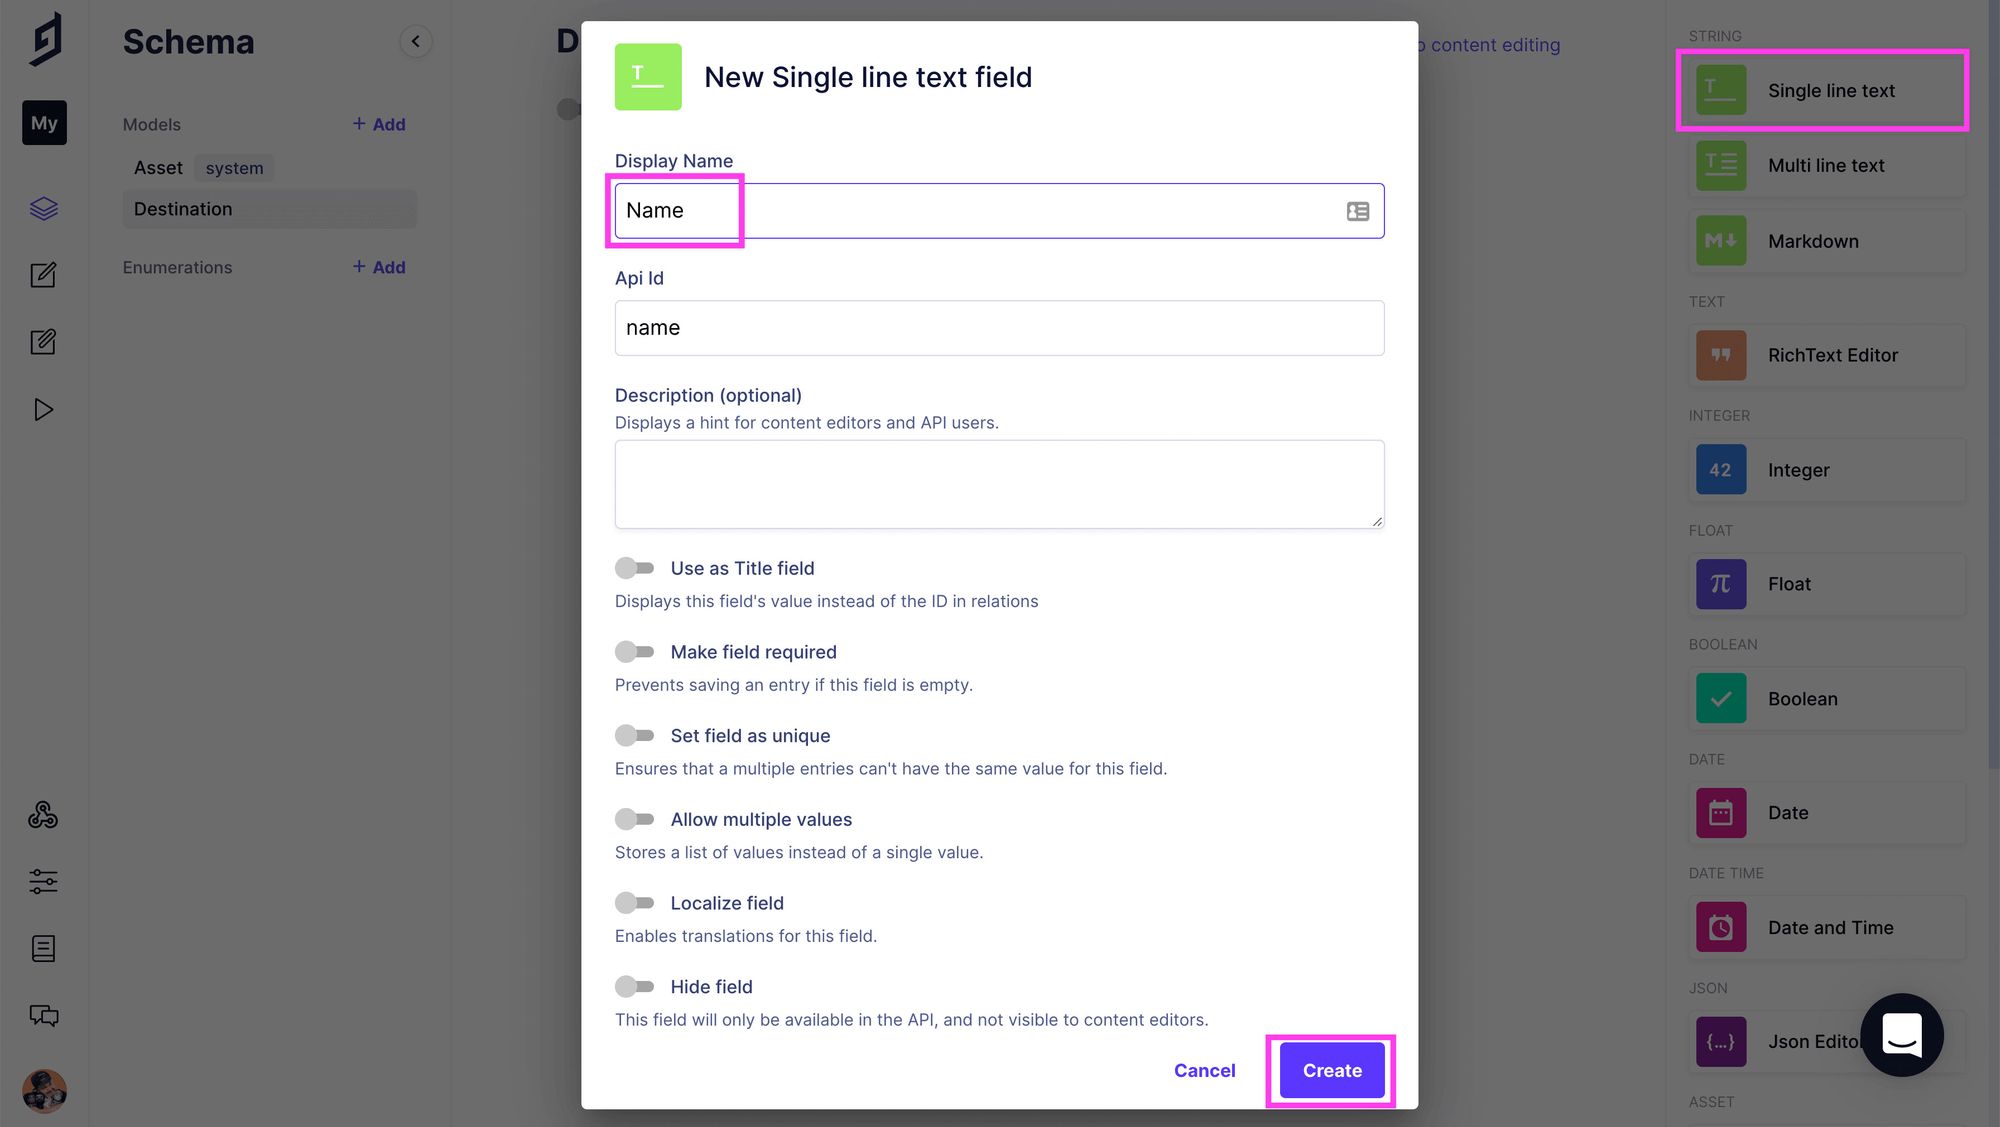
First, select Single line text in the right list of fields and add a Display Name of “Name”. This will also fill out App Id which you can leave as is. Then click Create.
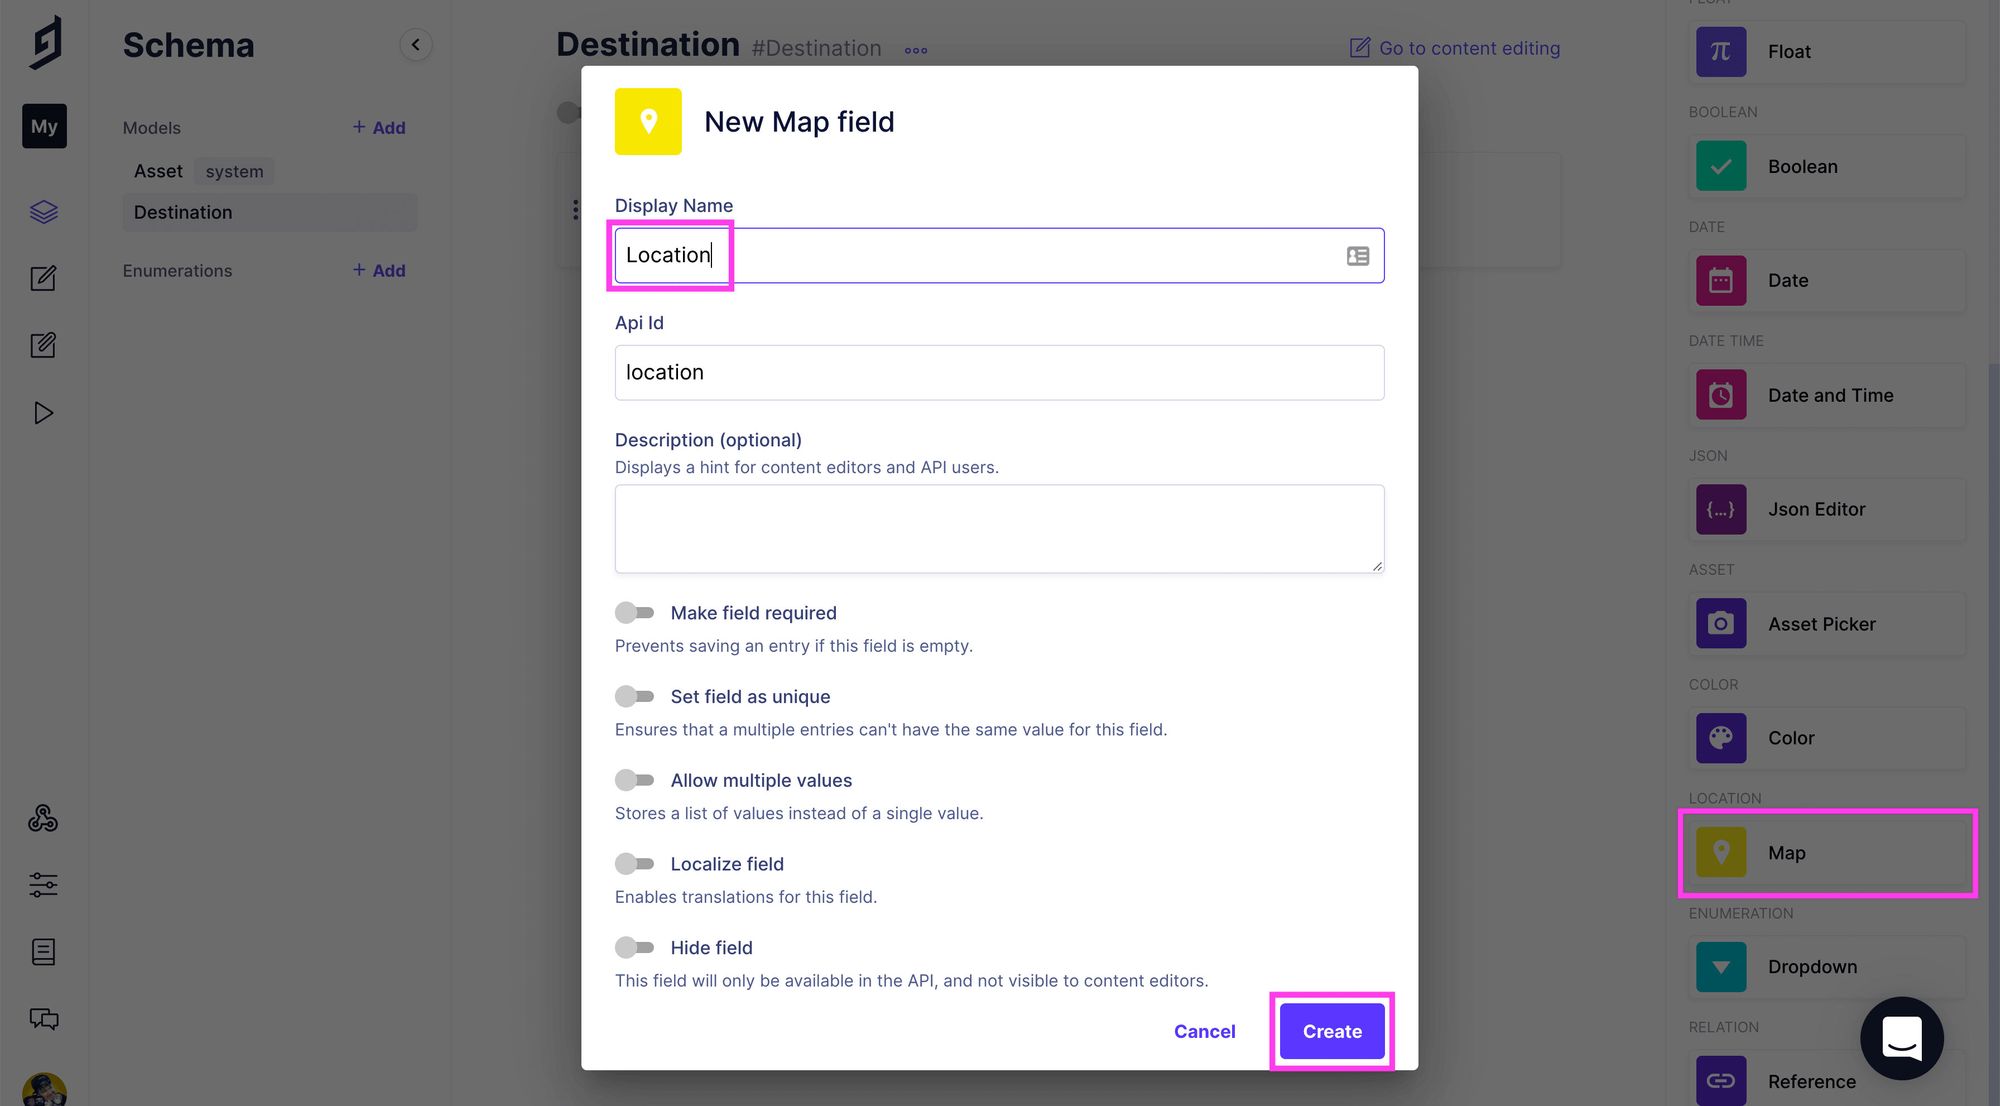
Next, scroll down in the field options on the right and under Location select Map. Add “Location” as the Display Name, which will set the App Id as “location” which you can leave as is. Then same as before, click Create.
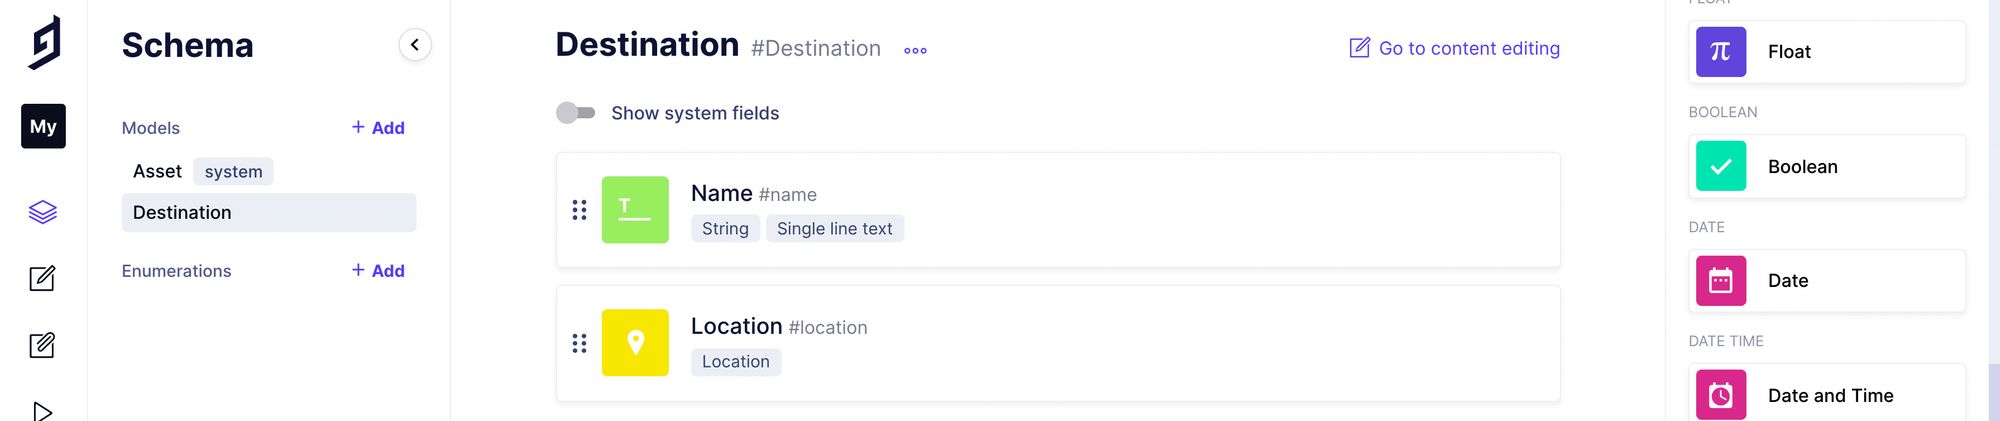
Now we have a Content Model which we’ll use to create our locations!
Creating our locations
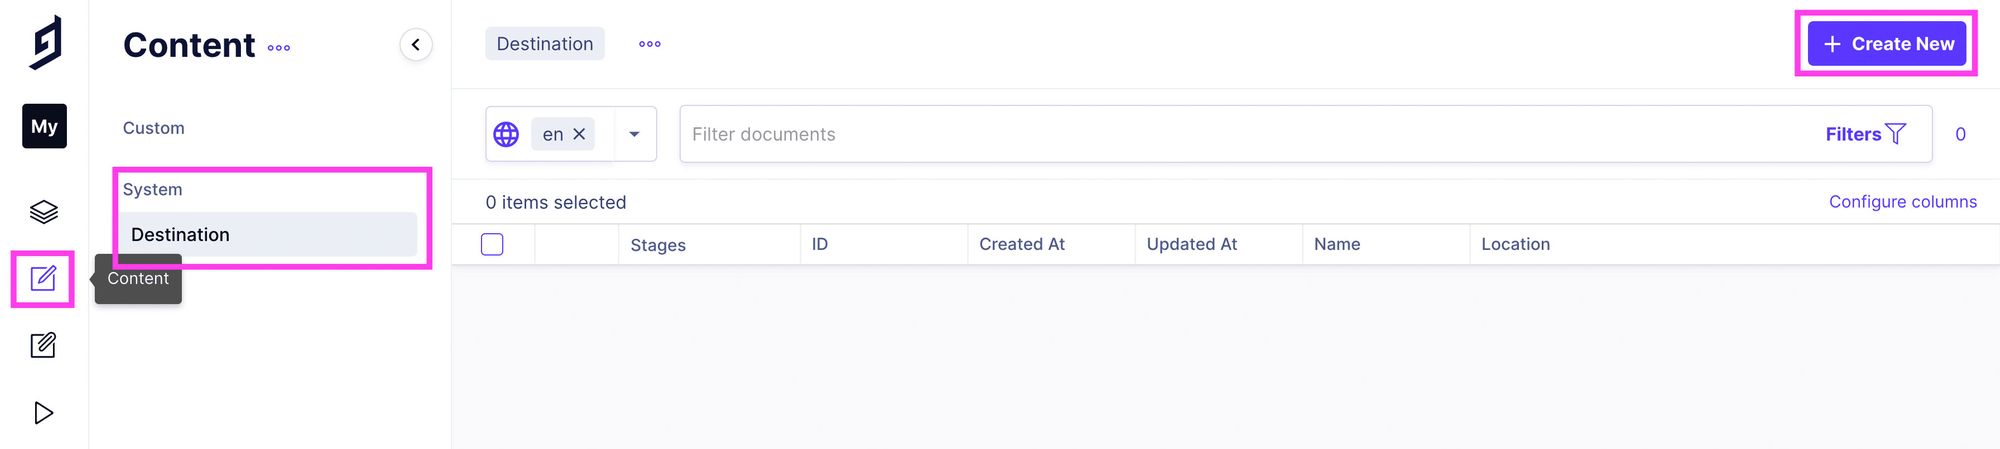
Finally, let’s create our locations. Navigate over to Content in the GraphCMS dashboard, make sure you’ve selected Destination under System (should be the only one), and select Create New.
Now we can start adding all of our locations! First, add the name of your location in the Name field, then you can use the Search box under Location to find that location on the map.
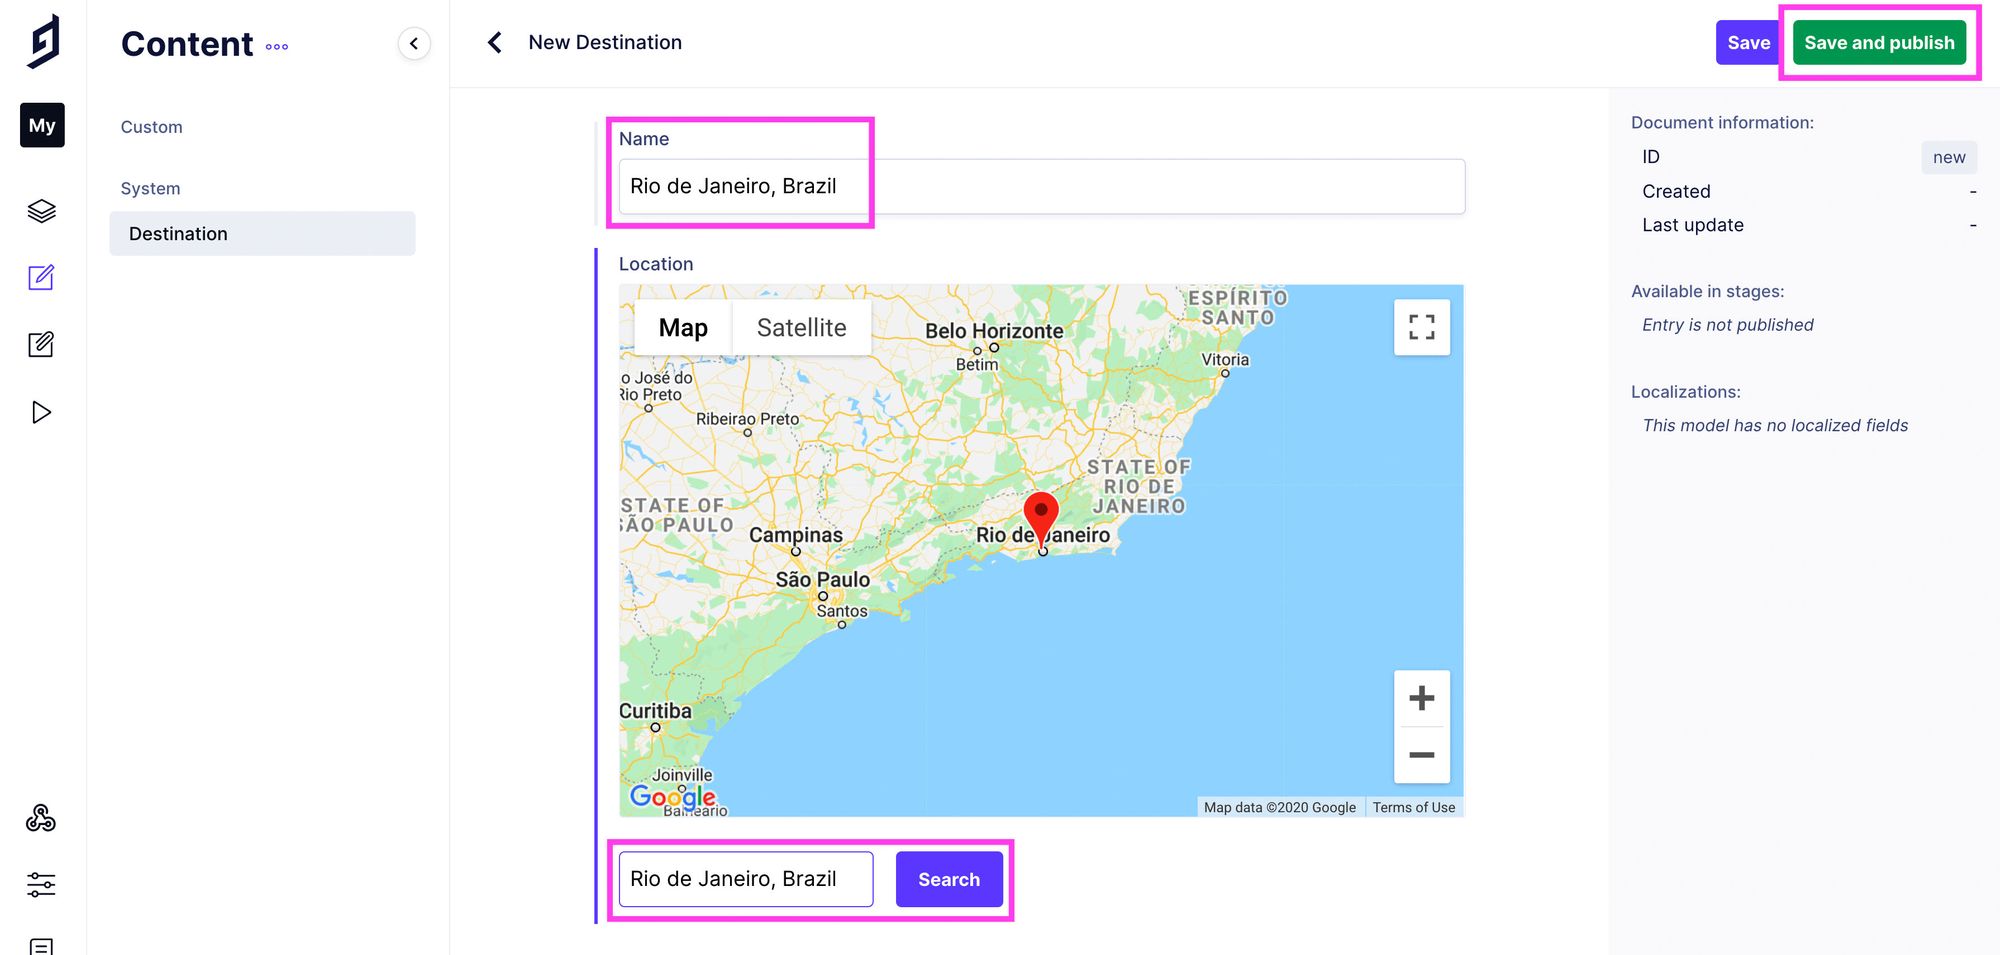
Once you’re good, hit Save and publish. This will create your first location!
Follow those same steps and create as many locations as you want.
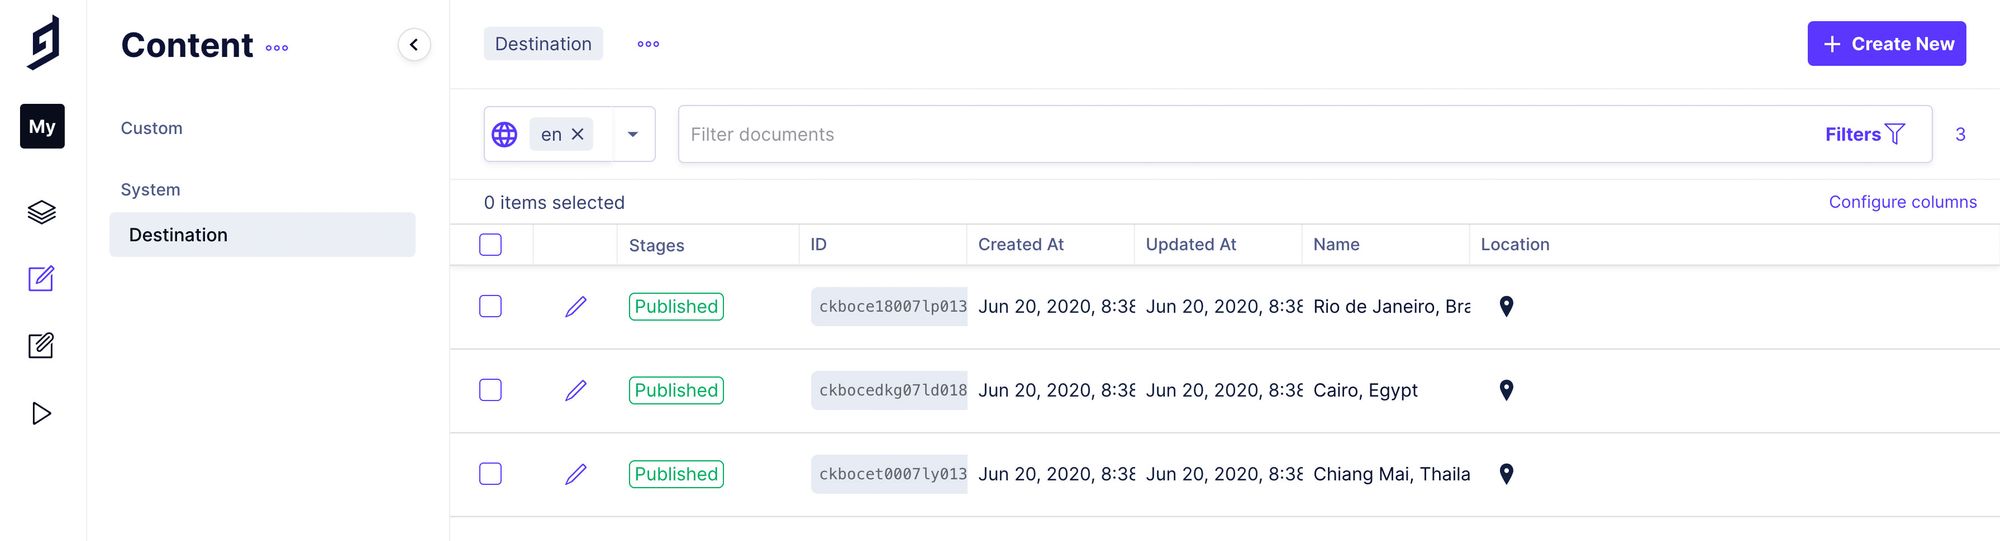
We’ll use these for our map and bucket list.
Step 3: Querying our GraphCMS location data with Gatsby and GraphQL
Now that we have our locations, let’s use them!
Adding a plugin to Gatsby to query our GraphQL data
First, we need to add a new plugin to our Gatsby project to query our GraphQL data. In your terminal make sure your development server isn’t running and run:
yarn add gatsby-source-graphql
# or
npm install gatsby-source-graphql
Next, open up your gatsby-config.js file in the root of your project and add the following to your plugins:
{
  resolve: 'gatsby-source-graphql',
  options: {
    typeName: 'GCMS',
    fieldName: 'gcms',
    url: '[API ENDPOINT]',
  }
}
This will be what sources our data from GraphCMS, but we need an endpoint.
Finding our API endpoint for GraphCMS
Open back up your browser and head over to your GraphCMS project. After selecting Settings in the left navigation, select API Access.
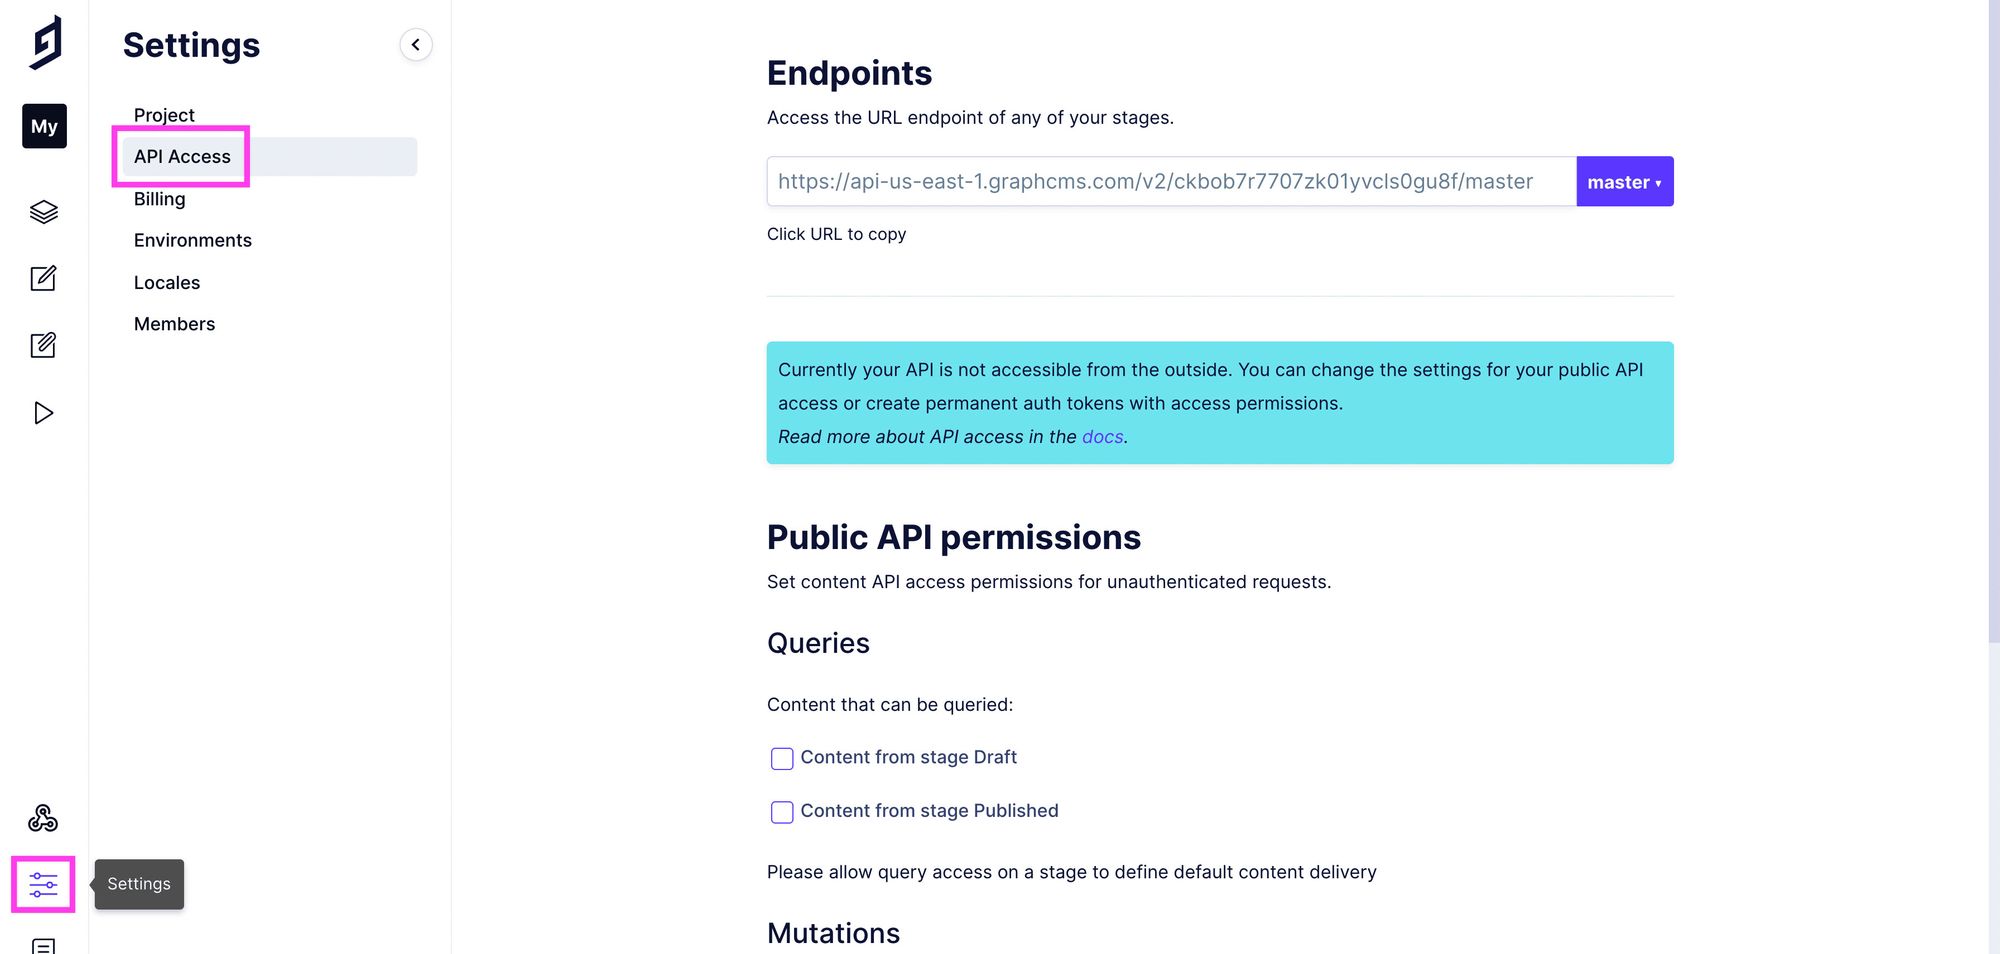
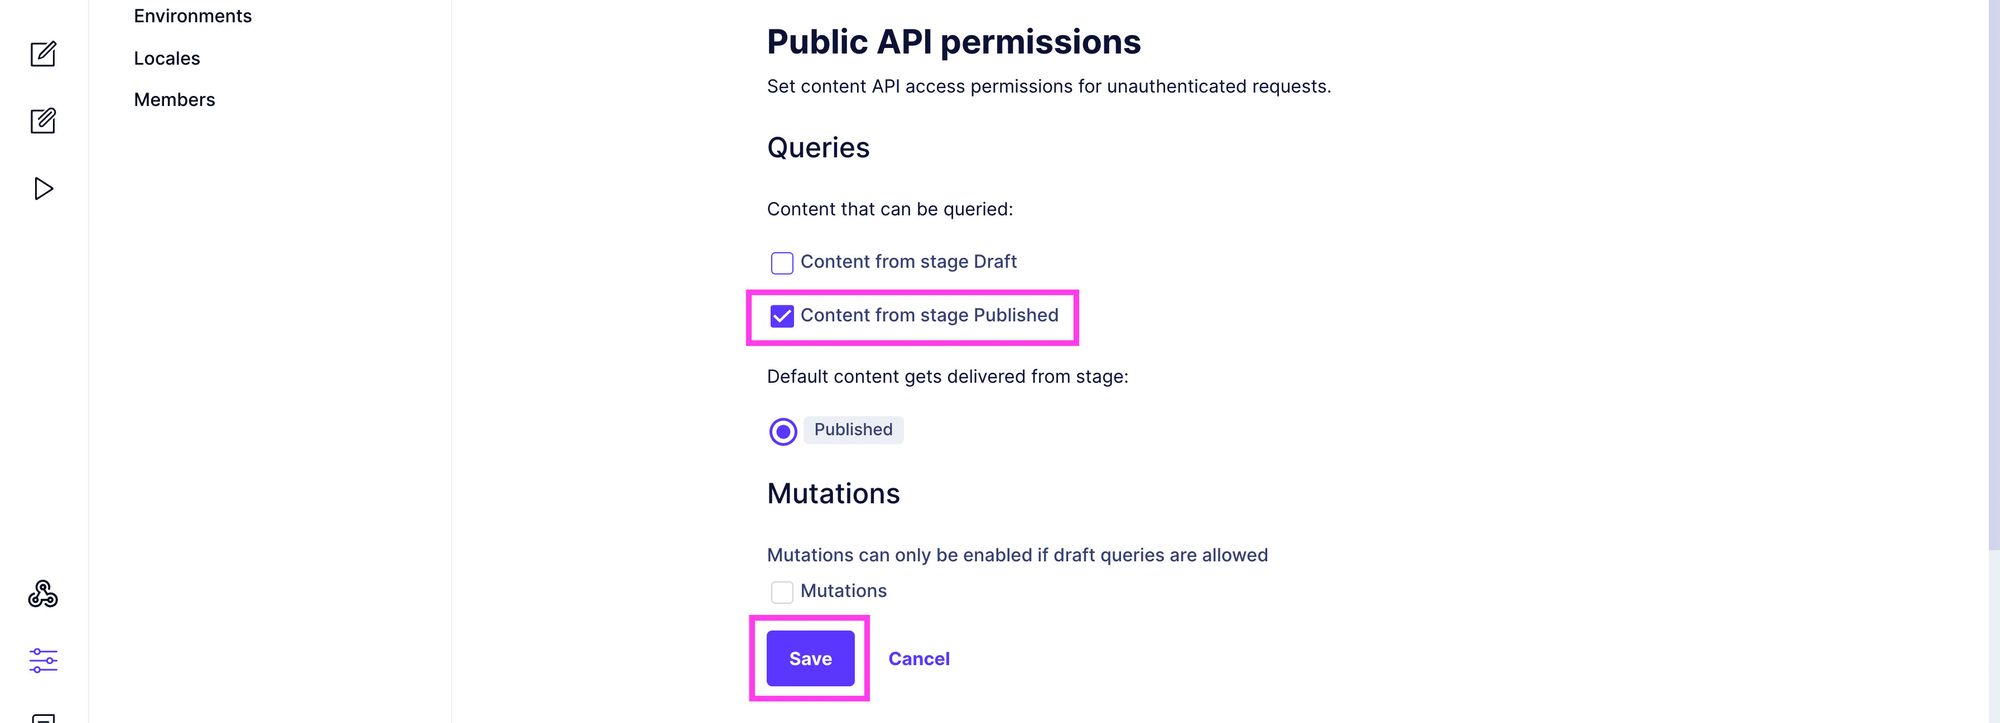
Before we copy our API Endpoint, first we need to update our permissions so we can query our API. Under Public API Permissions, check the box next to Content from stage Published and click Save.
Next, copy the URL under Endpoints:

And paste that in to your gatsby-config.js file that we modified above:
{
  resolve: 'gatsby-source-graphql',
  options: {
    typeName: 'GCMS',
    fieldName: 'gcms',
    url: 'https://[region-id].graphcms.com/v2/[project-id]/master',
  },
},
Note: your URL will have actual values inside of [region-id] and [project-id].
Save your gatsby-config.js file and start your development server backup (yarn develop) and we’re ready to go!
Querying our locations via GraphQL
Finally, let’s actually query our data so that we’ll be able to use it in our app.
We’re going to create a new React Hook that we’ll be able to use to grab our locations anywhere within our app.
Under src/hooks/index.js, add the following line to the existing list:
export { default as useDestinations } from './useDestinations';
This will allow us to more conveniently import our hook which we’ll create next.
Under src/hooks, create a new file useDestinations.js and paste in this code:
import { graphql, useStaticQuery } from 'gatsby';

export default function useDestinations() {
  const { gcms = {} } = useStaticQuery( graphql`
    query {
      gcms {
        destinations {
          id
          name
          location {
            latitude
            longitude
          }
        }
      }
    }
  ` );

  let { destinations } = gcms;

  return {
    destinations,
  };
}
Here, we’re:
- Importing the
graphqlanduseStaticQueryutilities from Gatsby - We’re creating a new function (or hook) that is exported by default
- In that function, we’re using
useStaticQueryto create a new GraphQL query which asks GraphCMS to return the data structure we defined. - That query returns a value which we destructure immediately to grab the
gmcsobject - We destructure
destinationsfromgmcsand return it as part of a new object from our hook
With this, we can now use our hook anywhere in our app!
Head over to your src/pages/index.js file, first import our new hook:
import { useDestinations } from 'hooks';
And at the top of the IndexPage component, query our data:
const { destinations } = useDestinations();
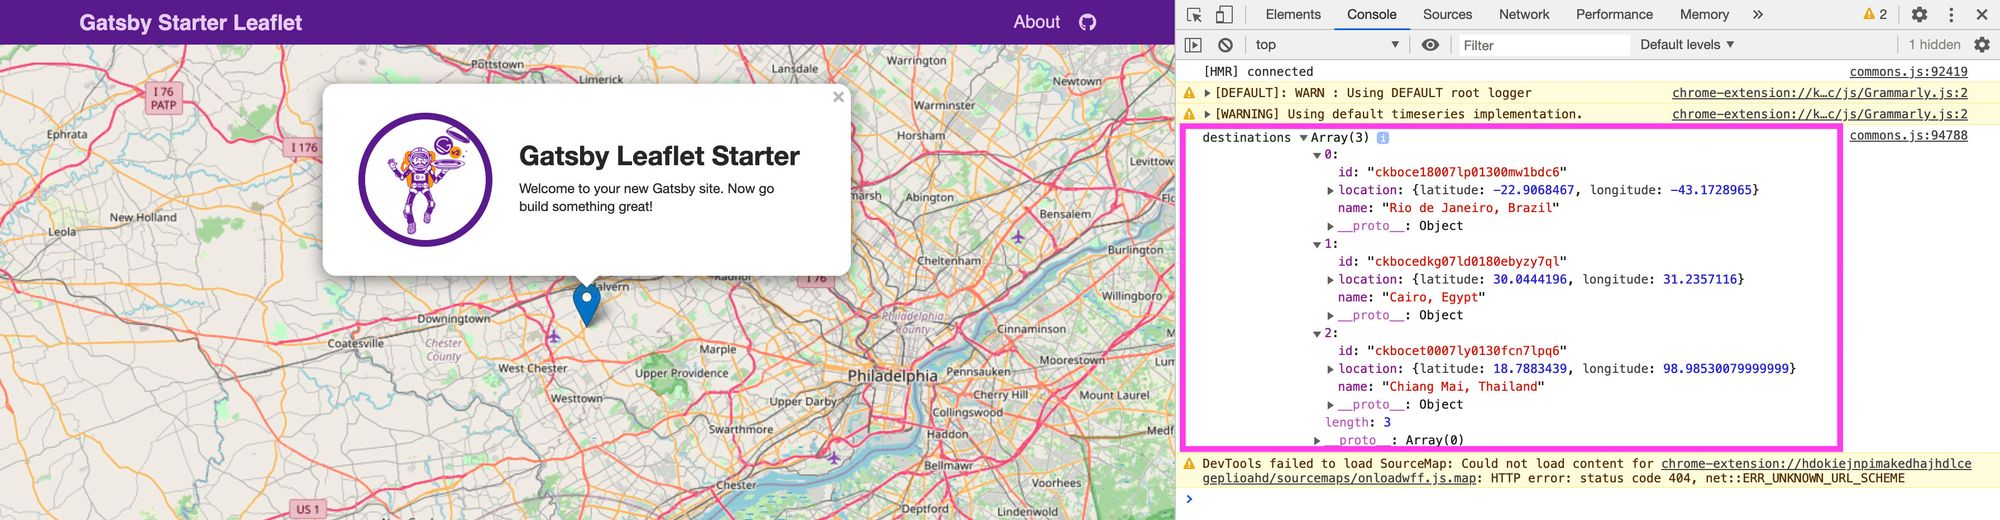
This puts all of our locations into the destinations variable. We can test that this works by console logging it out:
console.log('destinations', destinations);
And once we open up our browser and look in our web developer tools console, we can see our location data!
Step 4: Creating a bucket list of destinations and adding them to the map
We’re going to start with creating a simple text list of our destinations. This will let us see all of our destinations in an easy to read format.
Creating a text list of our destinations
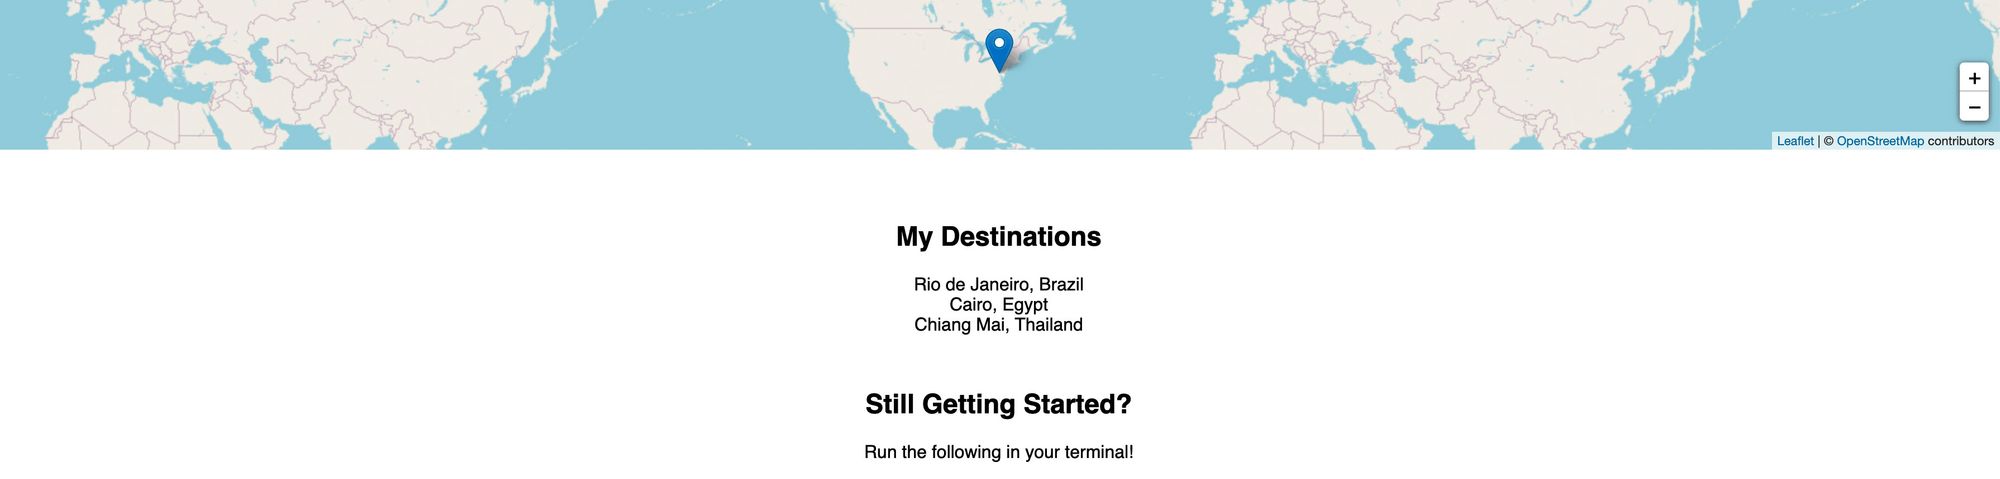
Inside of our IndexPage and above “Still Getting Started?”, let’s add the following code:
<h2>My Destinations</h2>
<ul>
  { destinations.map(destination => {
    const { id, name } = destination;
    return <li key={id}>{ name }</li>
  })}
</ul>
This code:
- Adds a new header for our list
- Creates a new unordered list
- Loops through our
destinationsand creates a new list item for each destination that include’s the location’s name
Once we hit save and reload, we should see our list under our map!

The list looks a little odd though right? We probably want to format it a little better to fit into the page.
Open up src/assets/stylesheets/pages/_home.scss and inside of the .home-start class, add:
.home-start {

  ...

  ul {
    list-style: none;
    padding: 0;
    margin: 1.2em 0;
  }
Let’s also modify the h2 to space things out a little better:
.home-start {

  ...

  h2 {

    margin-top: 2em;

    &:first-child {
      margin-top: 0;
    }

  }
Once you hit save and reload, it should look a little better.
Feel free to make additional changes, but we’ll leave it there for now.
Adding our destinations to the map
Now we can finally add our destinations to the map!
Inside of our <Map> component, we already have a <Marker>. This allows us to easily add a marker to the map given a position. We’ll take this concept and combine it with our text list to add our locations to the map.
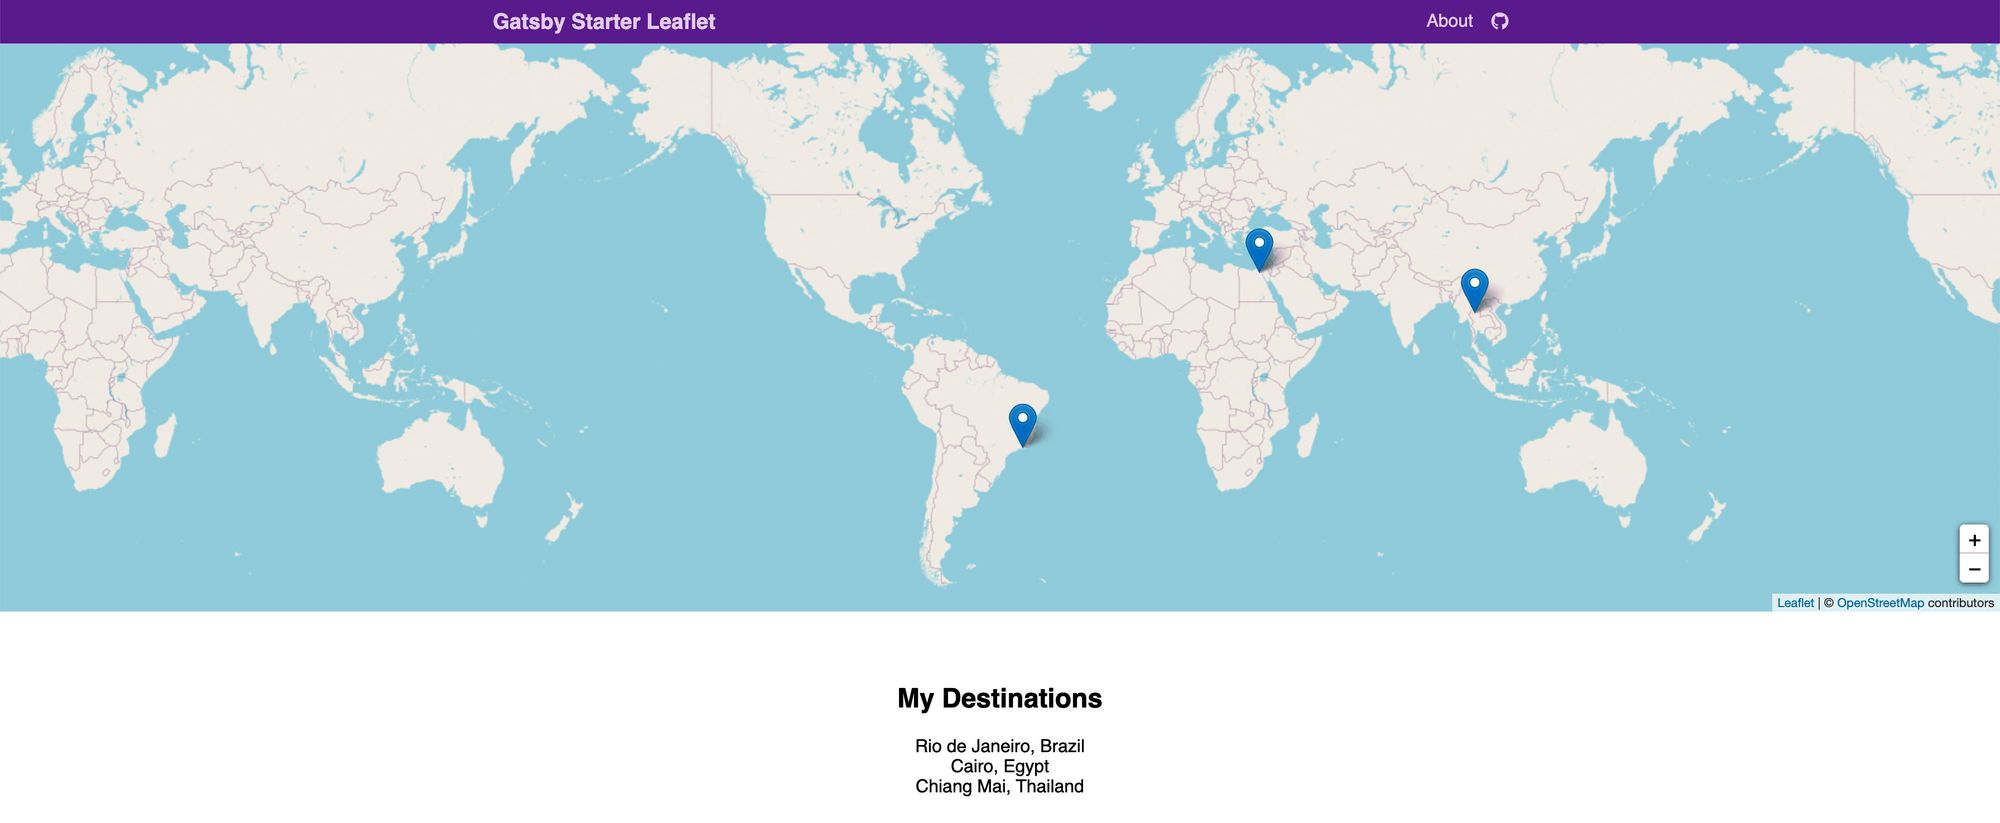
Let’s update our <Map> code to match the following:
<Map {...mapSettings}>
  { destinations.map(destination => {
    const { id, name, location } = destination;
    const position = [location.latitude, location.longitude];
    return <Marker key={id} position={position} />
  })}
</Map>
Here we:
- Loop through our
destinationsto dynamically create a new list of components inside our<Map> - Inside each loop instance, we destructure our date from
destination - We create a new
positionarray with the latitude and longitude - Create a new
Markerwhere we use our position to add it to the map
This gives us our markers on the map!
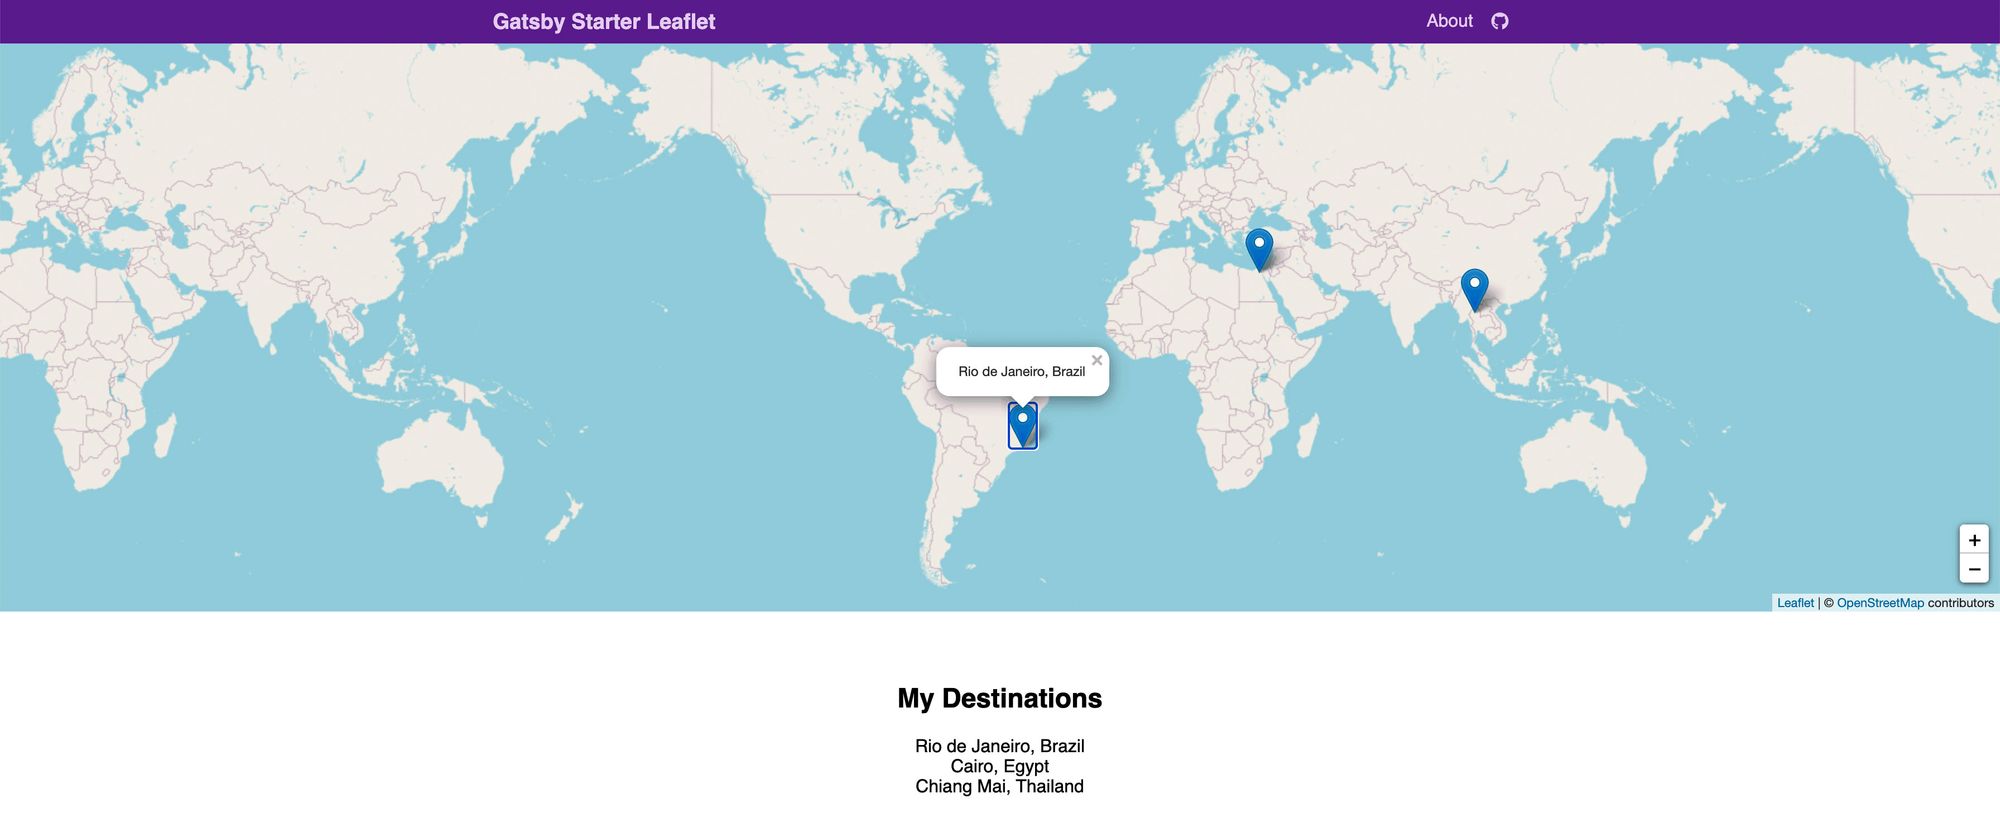
But we want to know what each of those locations are, so let’s also add a popup to each marker that will show the name.
First, we need to import Popup from react-leaflet:
import { Marker, Popup } from 'react-leaflet';
Then, let’s update our <Marker> component to return:
return (
  <Marker key={id} position={position}>
    <Popup>{ name }</Popup>
  </Marker>
);
And once we save and open back up our map, you can now click on each marker and see our destinations name!
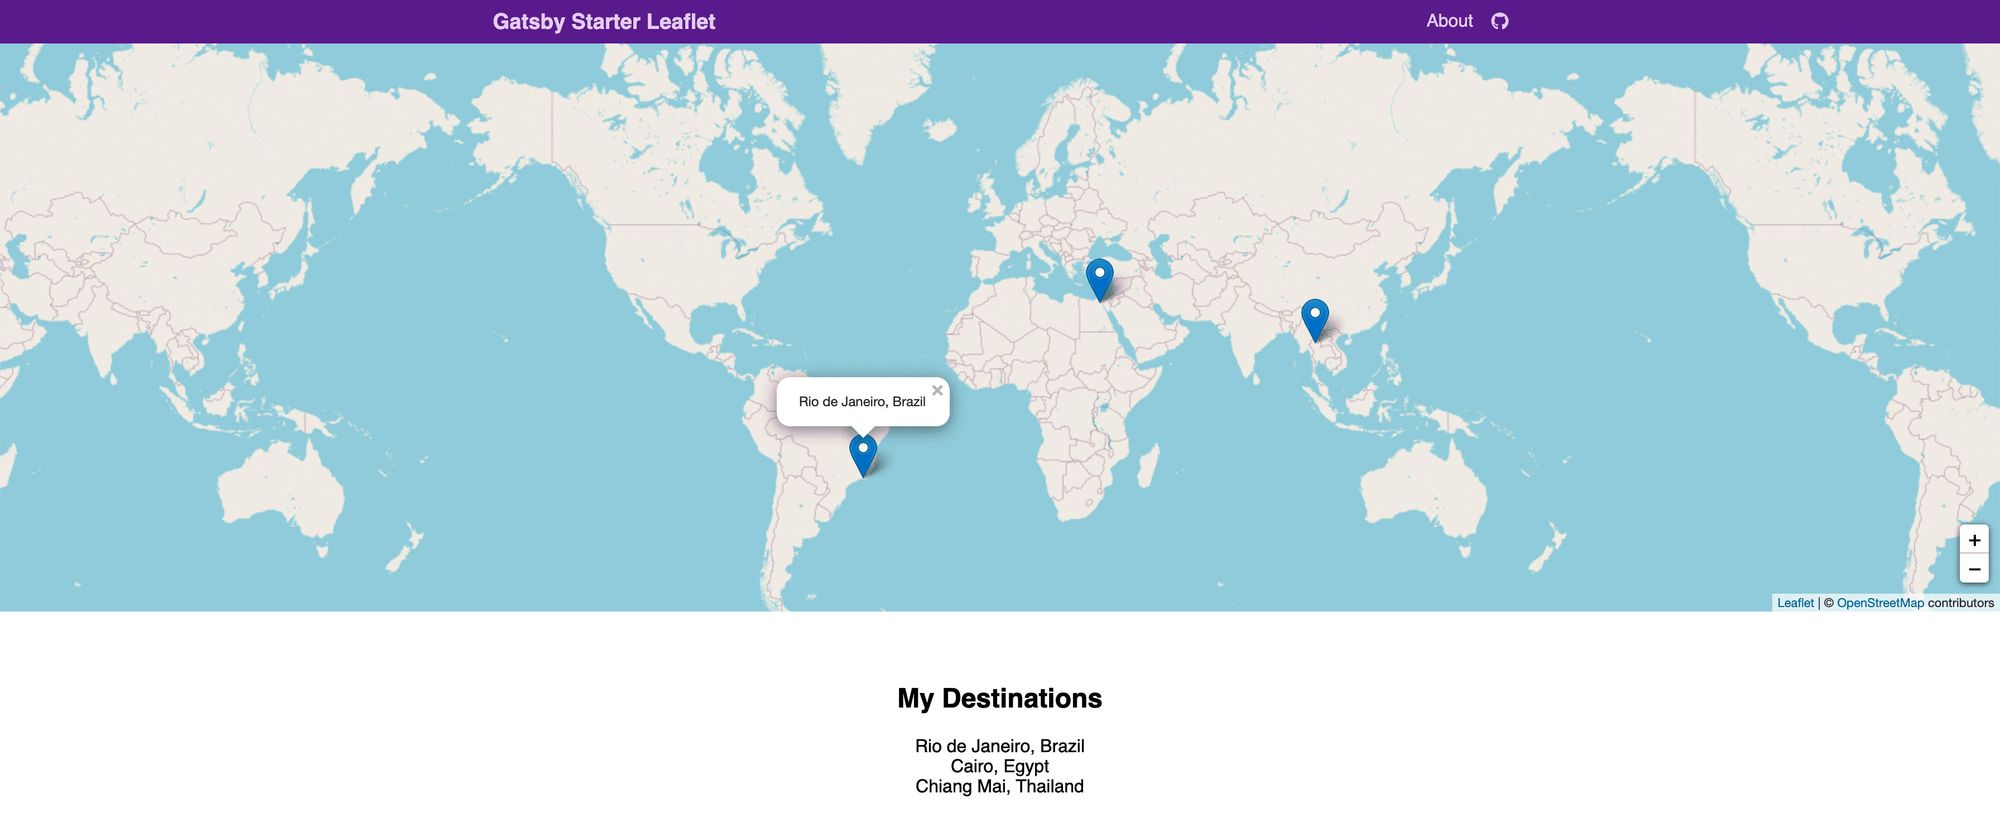
Before we’re done, center the map
Previously, our demo map centered on Washington, DC. Let’s update that to the center of the world since our map doesn’t focus on the United States.
Update the LOCATION variable to:
const LOCATION = {
  lat: 0,
  lng: 0,
};
And with that, we have our map!
What else other features can we add to our app?
Add a way to check off each location
Inside GraphCMS, you can add a new field to your Destination content model that allows you to select whether you visited each location or not.
With this value, we can add it to our query and update our map with some kind of indicator like a checkmark to show that we’ve checked it off our bucket list!
Customize your map background styles
We’re using a public version of OpenStreetMap which is open source, but Mapbox offers some cool maps we can use to make it look a little more impressive.
If you want to get started changing your map styles, you can check out this other walkthrough of mine to learn how to use Mapbox.
Check out the blog post or watch the video!
Style the map markers with a custom image
You can check out my video walk through on how to change the markers to a custom image.
Take that a step further and use the feature above to dynamically show a different marker image when you’ve checked off a location.
Check out the video on Egghead.io!
Want to learn more about maps?
Check out some of my other tutorials and videos:
- Mapping with React Leaflet (egghead.io)
- Mapping Apps with React, Gatsby, & Leaflet (youtube.com)
- How to create a Coronavirus (COVID-19) Dashboard & Map App with Gatsby and Leaflet (colbyfayock.com)
- How to Create a Summer Road Trip Mapping App with Gatsby and Leaflet (colbyfayock.com)
- How to build a mapping app in React the easy way with Leaflet (colbyfayock.com)
- Anyone Can Map! Inspiration and an introduction to the world of mapping (colbyfayock.com)
What’s on your travel bucket list?
Want to learn how to create a Travel Bucket List with all your dream destinations? ??
— Colby Fayock (@colbyfayock) June 23, 2020
I walk you through spinning up a new #mapping app with @GatsbyJS and @LeafletJS that shows all your destinations managed with @GraphCMS ?
? #webdev #100DaysOfCodehttps://t.co/1hhWiQOfYw
