The latest Eleventy 1.0 Canary releases have come with a special feature: 11ty Serverless. I've got a bigger article coming for this feature, but thought I'd take the time to put together a short guide on building a color code converter using this.
What is Eleventy Serverless?
11ty is a static site generator. This means that it generates HTML (or any file type really) when the site is built. Those files are then served from a static host (hopefully on a CDN). This makes for some great performance. It comes with a drawback around dynamic content or user input. Eleventy Serverless gives us the authoring experience we love in Eleventy (including the use of any template language and all of our data formats), but allows for things to be served via a serverless function. Currently it works with Netlify Functions, but also Netlify "On-Demand Builders." On-Demand Builders are functions that cache the result. Run it once and get static HTML on every other run.
There are a ton of applications from reducing build times for large sites to creating pages that rely on user input.
Building a color code converter using 11ty
To get started, we need to create a project and install the latest "canary" of the 1.0 release of 11ty.
npm init -y && npm install ^1.0.0-canary.38Only the latest canary builds of 11ty will have this functionality, so make sure to install one of these versions.
Setting up the basic templates
Next, let's build out some basic templates that will run our site. We'll create a _includes/base.njk template, and two pages: index.njk and color.njk.
The base template will be our HTML wrapper that the other content will flow into.
<!DOCTYPE html>
<html lang="en">
<head>
    <meta charset="UTF-8">
    <meta http-equiv="X-UA-Compatible" content="IE=edge">
    <meta name="viewport" content="width=device-width, initial-scale=1.0">
    <link rel="stylesheet" href="https://unpkg.com/some-nice-basic-css/global.css" />
    <style>.container{max-width: 80ch;margin: auto;</style>
    <title>{{ title }}</title>
</head>
<body>
    <main class="container">
        {{ content | safe }}
    </main>
</body>
</html>
Not much happening here. We insert a title variable and the content (and because this is Nunjucks, we pass the content through the | safe filter to render the HTML instead of a string.
Next, the homepage index.njk template.
---
title: "Simple Color Converter with 11ty Serverless"
layout: "base.njk"
permalink:
    build: "/"
---

<h1>{{ pageTitle }}</h1>

<form action="/post/" id="colorForm">
  <label for="type">Color Space</label>
  <select name="type" id="type">
    <option value="hex">Hex</option>
    <option value="keyword">Keyword</option>
  </select>
  <label>Color String
    <input name="color" type="text">
  </label>
  <button>Convert</button>
</form>

<pre>{{ eleventy | dump(2) }}</pre>

<script>
document.getElementById('colorForm').addEventListener('submit', function(event) {
    event.preventDefault()
    const type = event.target[0].value
    const string = event.target[1].value
    console.log(type, string)
    window.location.href =`/color/${type}/${string}/`
})

</script>
The first thing to notice here is that instead of the normal single string for the page's permalink, we're going to use an object in the frontmatter. This is unnecessary, but I'm getting in the habit of this syntax, since 11ty Serverless expects an object.
Past that, this page has a static form and a small script. The form and script will take take a type of color value – such as hexadecimal or keyword – and the color value and redirect the user to our dynamic route. If you submit that form without creating the color.njk file and serverless builds, not a whole lot will happen.
Creating the first serverless template
The color.njk file will be a pure serverless template. In 11ty Serverless, we can specify different permalinks for different situations. The default permalink is the build permalink we saw in index.njk. Any other key in the permalinks object needs to match a named item in an .eleventy.js configuration file.
Let's create the .eleventy.js file before creating our template.
const { EleventyServerlessBundlerPlugin } = require("@11ty/eleventy");

module.exports = function(eleventyConfig) {
  eleventyConfig.addPlugin(EleventyServerlessBundlerPlugin, {
    name: "color", // The serverless function name from your permalink object
    functionsDir: "./netlify/functions/",
  });
}
The serverless functionality is in an optional plugin. To use it, add the plugin inside your configuration. The plugin options object will provide a few details to the bundler. In this case, we'll name the serverless function color and tell 11ty where to find (or create) our new Netlify Functions.
The main output of this is to create an infrastructure for a Netlify Function to use. The build will generate a /netlify/functions/color directory and insert everything that's needed. We have a choice to make in the netlify/functions/color/index.js file: fully dynamic or cached.
For my money, cached wins. To use Netlify On-Demand Builders instead of a regular serverless function, edit the last few lines of the index.js file. This will improve long-term performance, as there are only so many colors to choose from. Each time a color/type is used, Netlify will cache the result and not run our script again.
// /netlify/color/index.js

// Choose one:
// * Runs on each request: AWS Lambda (or Netlify Function)
// * Runs on first request only: Netlify On-demand Builder
//   (don’t forget to `npm install @netlify/functions`)

// exports.handler = handler;

const { builder } = require("@netlify/functions");
exports.handler = builder(handler);
In order to keep infinite build loops at bay (and not commit built files), we can add a few entries to our .gitignore file.
netlify/functions/color/*
netlify/functions/color/**/*
!netlify/functions/color/index.js
Eleventy won't watch files in the .gitignore file. We do need to make sure to keep (and watch) the index.js file that 11ty just created for us. While this file gets generated on the first run, it can be safely edited, as 11ty won't override it in the future.
Now that we have serverless functions graciously generated for us, let's use them in our template. In a new color.njk file, let's create a dynamic route in our permalink object.
---
layout: "base.njk"
permalink:
    color: "/color/:type/:color/"
---

{% set color = eleventy.serverless.path.color %}
{% set type = eleventy.serverless.path.type %}

<h1>Color Conversions for {{ type }} {{ color }}</h1>
By using the color key, we tell 11ty which serverless function to use to process this file. By running it through that script, we get access to a new eleventy.serverless object in our data. This is where the path and/or query for this route will live. In this case, we have a color and a type data that match to the :color and :type in the permalink definition. These are dynamic pieces that users can enter into the URL.
For ease of use, let's use a Nunjucks {% set %} tag to simplify those variables. That's all it takes to set up a dynamic route. Try different combinations of items here and see how the data that shows up on the page changes.
The dynamic route might be set up, but it doesn't do a whole lot yet. Let's create a custom filter to take the type and color and return something useful for them.
A progressive enhancement aside
You may have noticed earlier in the tutorial that we added an action to our form. The action doesn't do anything since we're using event.preventDefault(). However, what happens if someone has JavaScript turned off? Let's make sure they see our amazing serverless work, as well!
Since there's an action URL, let's tell Netlify how to handle that form submission by redirecting the form URL to the final URL and using the query parameters that come along the way to build it.
In the netlify.toml file (that the 11ty Serverless code created for us), let's add a new redirect rule.
[[redirects]]
from = "/post/"
to = "/color/:type/:color/"
status = 301
  [redirects.query]
  color = ":color"
  type = ":type"
We'll tell Netlify to redirect any request from /post/ to /color/:type/:color/. Add a 301 status and then use [redirects.query] to specify what "splats" to substitute our query parameters for. Now, if JavaScript is turned off, the natural form submission will work, as well.
Creating a custom filter to display color conversions
At this point, we can treat this template like we do any other 11ty template. For our use case of converting color codes from hexadecimal and keyword to HSL, RGB, and other types, we can create a filter that takes the values and returns a list of conversions. We'll use the NPM package color-convert to do this.
npm install color-convertNow, we'll add a filter to our .eleventy.js config.
const { EleventyServerlessBundlerPlugin } = require("@11ty/eleventy");
// Require the package we just installed
const convert = require('color-convert');
module.exports = function (eleventyConfig) {

  eleventyConfig.addPlugin(EleventyServerlessBundlerPlugin, {
    name: "color", // The serverless function name from your permalink object
    functionsDir: "./netlify/functions/",
  });

  eleventyConfig.addFilter("convert", function (color, type) {
    // usage: {{ color | convert(typeValue) | safe }}

    // Our conversion targets
    const colorSpaces = [
      "rgb", "hsl", "hex", "lch"
    ]
    // Map over the conversion targets and convert
    // based on the type and color provided
    // Full details on how this package work can be found
    // here: https://www.npmjs.com/package/color-convert
    const conversions = colorSpaces.map(space => {
      // Since we can't convert a hex to a hex
      // We protect with this boolean value
      const doWrite = type != space
      // Create the conversion value if doWrite is true
      const conversion = doWrite ? convert[type][space](color.toLowerCase()) : ''
      // Return a list item with the text we want to show on the frontend
      // And then join the map we're in
      return doWrite ? `<li>
        ${space}: <code>${conversion}</code>
        </li>
    ` : ''
    }).join('')

    // Return an unordered list (or whatever markup you want)
    return `<ul>
        ${conversions}
      </ul>`
  });
};
This code will take the color and type from the color.njk template and return an unordered list of conversion values.
Each conversion needs to know the starting color space and the finished color space. So, we'll create an array of color space targets and then build them using the methods provided by color-convert. There are a couple checks in there to make sure all keywords are lowercase (as expected) and make sure that the type and target don't match (since the NPM package can't handle that).
Next, let's add this to the color.njk template.
---
layout: "base.njk"
permalink:
color: "/color/:type/:color/"
---
{% set color = eleventy.serverless.path.color %}
{% set type = eleventy.serverless.path.type %}
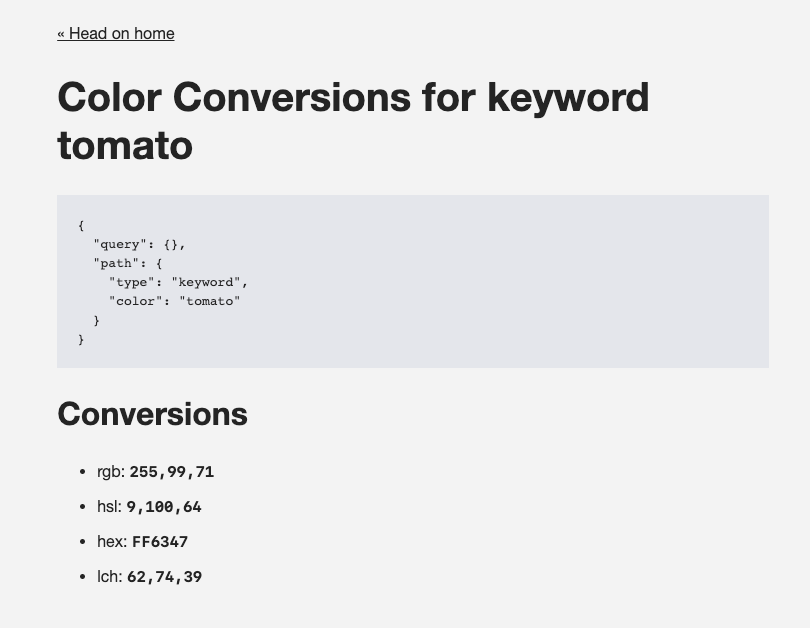
<a href="/">« Head on home</a>
<h1>Color Conversions for {{ type }} {{ color }}</h1>
<h2>Conversions</h2>
{{ color | convert(type) | safe }}And that's it. We have a dynamic color converter.
What are you going to use Eleventy Serverless for? Let me know on Twitter.