How to use SVGs in React

This article will explore how to use SVG in React in three examples

Do you miss the days when your static websites were built in mere seconds? Are you tired of finagling massive Javascript libraries just to write simple frontend code? Do you yearn for the endless customization of Sanity, but enjoy working with markdown files? Maybe some Sanity-Hugo integration is just the thing you need.

Hugo is a static site generator written in Golang that markets itself as "the world's fastest framework for building websites." It appears they earn the right to the claim. Sanity is the world's most flexible headless CMS. Together they make a formidable team.
In this tutorial, we'll build a custom integration with Sanity and Hugo using Netlify. Our frontend will be built in HTML, sprinkled with Golang shortcodes, and won't contain a single line of JSX. The completed site will build in 18 seconds and can be deployed in one click from the Sanity dashboard. The code we use can be applied to any static site generator that reads markdown files, so you won't be tied down to a single framework when we're done. We'll accomplish this by writing our own build plugin on Netlify -- an instructive project that we'll walk through step-by-step together. javascript
You can see a demo of our finished product here and the repo on Github.
If you want to learn Hugo, the tutorials on Giraffe Academy can quickly get you up and running.
Instructions for installing the Hugo CLI can be found on their site. For Windows users, I heartily recommend installing via Chocolatey.
We'll begin by creating the folder that will house both our Hugo and Sanity files. I'm naming mine my-hugo-sanity-starter.
Change directories into your new folder, then clone the starter repository.
cd my-hugo-sanity-starter
git clone https://github.com/bathrobe/hugo-sanity-starter-tut web
This is a simple Hugo template for a single author blog, with support for Hugo's ultra-easy taxonomy pages. It is battle-tested and ready for our custom integration, built from themes by Giraffe Academy and salcan. You can see what it looks like by running cd web then hugo server. Hugo's dev server can be found by default at http://localhost:1313/.
Change directories back to the root folder (cd ../) and start a new Sanity project with sanity init. Select "Create new project," selecting default dataset and output path, then choose the "blog (schema)" project template.
To help keep your files organized, you may want to change the name of your Sanity folder to studio.
It should look a little something like this:
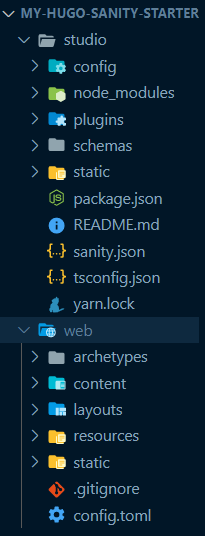
Delete author.js in the schemas folder and remove the author and mainImage fields from schemas/post.js. Delete the preview at the bottom. Change the name of the publishedAt field to date, so we can take advantage of Hugo's pre-built 'date' parameter.
//in schemas/post.js
{
name: 'slug',
title: 'Slug',
type: 'slug',
options: {
  source: 'title',
  maxLength: 96,
  },
},
// delete author and mainImage fields here
{
name: 'categories',
title: 'Categories',
type: 'array',
of: [{type: 'reference', to: {type: 'category'}}],
},

//then replace publishedAt with date
{
name: 'date',
title: 'Published at',
type: 'datetime',
},
//delete preview at bottom
Remove both import and export for the author in schema.js, then head back into your Sanity folder with cd studio. Run sanity deploy to send your new blog to the internet! Before moving on, create some placeholder posts and categories. That way, you can witness firsthand the wonder of Sanity documents automatically appearing in your content folder.
Since Netlify will play a big role in our project, we should deploy it early.
First, we'll create a new repo and connect our site.
Go to GitHub and create a new repository. Copy the URL of the new repo and run the following in the web folder:
git remote set-url origin the_url_of_your_new_repo_here
Now, for the usual:
git add .
git commit -m "first commit"
git push
Voila! No need to delete your .git files or make a mess, as I often do when cloning other people's repositories.
Log in to Netlify and select "New Site from Git." Select Github as your provider, find your repo and select it to begin the deploy!
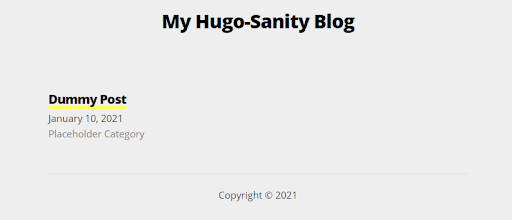
In about fifteen seconds, we should see a clean blog with some dummy content before us.
Now we have a basic Hugo site up. Our studio is waiting in the wings to supply our content. How do we get them to cooperate?
Hugo is a static site generator from a simpler time. It is designed to read local markdown files in its content folder, which it then compiles at warp-speed using Go. To read Sanity data, Hugo requires us to create those markdown files.
Our solution in this guide is to configure a Netlify build plugin that runs before Hugo begins to compile. It will fetch our data from Sanity and reformat each post into a clean, readable markdown file. We'll use Sanity's client and markdown renderer, a little NodeJS, and Netlify's helpful stock of utility functions to piece it together.
Install the Netlify CLI and run netlify link in our web root folder to hook our local files up to the Netlify deployment. Netlify will prompt us to select the deployment we want to link; choosing the current git remote origin is fine. With the site linked, we can run commands like netlify build and netlify build --dry that allow us to test our plugin without requiring a deploy.
We'll begin developing our plugin by initializing a package.json in the root of our web folder by running npm init -y.
Next, we'll install all dependencies in the web's root folder. Run npm install @sanity/block-content-to-markdown @sanity/client fs-extra.
Once our dependencies are installed, we'll create a netlify.toml file in the web root that tells Netlify where our plugin will live. Only two lines need to be added.
//netlify.toml
[[plugins]]
package = "/plugins/netlify-sanity-md"
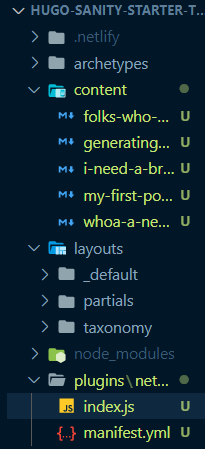
Next, create a folder in the web root named plugins and a folder inside plugins named netlify-sanity-md. Inside netlify-sanity-md, create an index.js and a manifest.yml.
More about the plugin structure can be found in Netlify's documentation.
Our web folders should now look a little something like this:
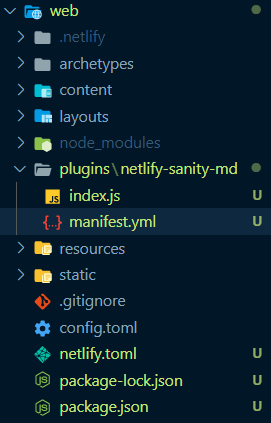
In the manifest.yml file, point the plugin back to the config.toml by giving it a name.
name: netlify-sanity-md
We are now safe to proceed to "index.js" and begin writing the script. Crack your knuckles and brew some coffee, we're building our very own plugin!
We'll start with the skeleton.
//plugins/netlify-sanity-md/index.js

module.exports = {
    onPreBuild: async ({ utils, packageJson }) => {
    console.log("my plugin loaded!")

        //import modules and define some terms
        try {
        //get sanity data
        //then output as md files in our content folder


        } catch (error) {
            utils.build.failBuild('Failure message', { error })
          }
        },
        }
We export a module that will be run before build time, specified by the onPreBuild command. It's an async function that takes in Netlify's utility for error handling, helping us to always have a clear view of what's going on.
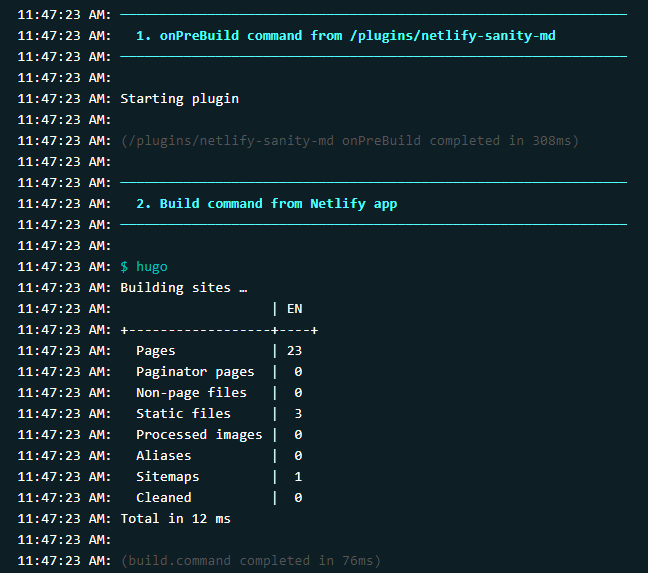
Test the code out by running netlify build in your console. (Note: I recommend manually deleting the public folder after each build to keep the workspace clean). In the middle of the message, we should see the happy little log below:
> Loading plugins
- /plugins/netlify-sanity-md@1.0.0 from netlify.toml

────────────────────────────────────────────────────────────────
1. onPreBuild command from /plugins/netlify-sanity-md
────────────────────────────────────────────────────────────────
my plugin loaded!

(/plugins/netlify-sanity-md onPreBuild completed in 20ms)
Let’s now give our plugin a job.
First, we'll import the libraries we need. Note that we set the Sanity CDN to false for now, so we can get fresh data every time we run the build.
Next, we specify any serializers we'd like to use with our Portable Text, Sanity's futuristic tool for rendering rich text across gazillions of presentation layers. In this example, we'll make a markdown code block, but there is much more you can do with this tool.
// immediately after the console.log

const fs = require('fs-extra')
const toMarkdown = require("@sanity/block-content-to-markdown");
const client = require("@sanity/client")({
  projectId: "YOUR_PROJECT_ID",
  dataset: "YOUR_DATASET",
  useCdn: false,
});

//add any serializers for your portable text
const serializers = {
  types: {
    code: (props) =>
      "```" + props.node.language + "\n" + props.node.code + "\n```",
  },
};
With our imports and constants ready, we can move on to manipulating the filesystem. Our first step will be to read the content directory and clean it out. This way we will never risk any deleted posts appearing on our Hugo site.
//immediately after serializers

fs.readdir("./content", (err, files) => {
  if (err)
  console.log(err);
  else {
    files.forEach(file => {
      fs.unlink(`content//${file}`, err => {
        if (err) throw err;
      })
    })
  }
  })
  try { ...
The filesystem reads our content folder, adds a callback function to handle any errors, and then "unlinks" each file in the folder-- "unlink" is Node for "delete".
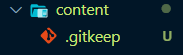
We can test this snippet out before going further. In the content folder, there should be a .gitkeep and dummy-post.md. Run netlify build. When it completes, our dummy-post.md and the .gitkeep should be gone.
If your content folder is now completely empty, congratulations! The first step of our plugin is complete. Before you move on, add .gitkeep back to the folder. By default, GitHub does not push empty folders to a repo, so .gitkeep ensures the folder will exist.
Now we'll move into our try-catch block. I'll comment each action in the code step-by-step to explain what happens, but there will be a cleaner version at the end of the section for copy and pasting.
First, we'll translate the Sanity fields into YAML frontmatter. We obtain our data by running a query in GROQ, Sanity's powerful in-house query language. Note that we follow the array created by the categories query to fetch the titles in our category reference.
try {
  await client
  //fetch our post data from the Sanity client using GROQ
  .fetch(`
  *[_type == "post"]{categories[]->{title}, date, slug, title, body}
    `)
  .then((res) =>
  //when we receive it, we'll loop through all our posts...
    res.map(async (post) => {
    //...and initialize YAML frontmatter with three hyphens...
    let frontmatter = "---";
    //... then we'll use the Object.keys() method,
    //which will return each of our Sanity fields
    Object.keys(post).forEach((field) => {
    //if the field is slug, we retrieve the current value
      if (field === "slug") {
        return (
          frontmatter += `\n${field}: "${post.slug.current}"`
          );
        } else if (field === "categories") {
        //if the field is the categories array,
        //we output each category's title
        return (frontmatter += `\n${field}: [${post.categories.map(
          (cat) => `"${cat.title}"`
          )}]`);
      //if the field is the body, we skip it
          } else if (field === "body") {
            return;
      //and for every other field we output the value of that post
          } else {
          frontmatter += `\n${field}: "${post[field]}"`;
          }
        });
      //then we end the frontmatter with three more hyphens
    frontmatter += "\n---\n\n";
Good job! With our frontmatter created, we can move on to formatting the body of our post. Thankfully, this is possible due to Sanity's block-content-to-markdown package. We'll add the front matter to the output of Sanity's toMarkdown() package and store it in the wholePost variable.
const wholePost = `${frontmatter}${toMarkdown(post.body, {
serializers,
})}`;
Almost done! All that's left to do is output each wholePost into our filesystem. Then, when the content folder is full of our generated markdown files, Hugo compiles them! The rest of index.js should look like this:
const filePath = `./content/${post.slug.current}.md`;
fs.outputFile(filePath, wholePost, function (err,data) {
  if (err) {
    return console.log(err);
  }
  });
  })
  )
} catch (error) {
    utils.build.failBuild('Failure message', { error })
    }
  },
  }
Here we simply call the file system's outputFile() method for our posts and log any errors. With that, our plugin is complete!
Our entire "index.js" should now look like this:
module.exports = {
  onPreBuild: async ({ utils, packageJson }) => {
    console.log("Starting plugin");
    //imports
    const fs = require("fs-extra");
    const toMarkdown = require("@sanity/block-content-to-markdown");
    const client = require("@sanity/client")({
      projectId: "YOUR_PROJECT_ID_HERE",
      dataset: "YOUR_DATASET_HERE",
      useCdn: false,
    });

    //add any serializers for your portable text
    const serializers = {
      types: {
        code: (props) =>
          "```" + props.node.language + "\n" + props.node.code + "\n```",
      },
    };

    fs.readdir("./content", (err, files) => {
      if (err) console.log(err);
      else {
        files.forEach((file) => {
          console.log(`Deleting: ${file}`);
          fs.unlink(`content//${file}`, (err) => {
            if (err) throw err;

          });
        });
      }
    });

    try {
      await client
        .fetch(`*[_type == "post"]{categories[]->{title}, date, slug, title, body}`)
        .then((res) =>
          res.map(async (post) => {
            //output YAML frontmatter here
            let frontmatter = "---";
            Object.keys(post).forEach((field) => {
              if (field === "slug") {
                return (frontmatter += `\n${field}: "${post.slug.current}"`);
              } else if (field === "categories") {
                return (frontmatter += `\n${field}: [${post.categories.map(
                  (cat) => `"${cat.title}"`
                )}]`);
              } else if (field === "body") {
                return;
              } else {
                frontmatter += `\n${field}: "${post[field]}"`;
              }
            });
            frontmatter += "\n---\n\n";

            const wholePost = `${frontmatter}${toMarkdown(post.body, {
              serializers,
            })}`;

            const filePath = `./content/${post.slug.current}.md`;
            fs.outputFile(filePath, wholePost, function (err, data) {
              if (err) {
                return console.log(err);
              }
            });
          })
        );
    } catch (error) {
      utils.build.failBuild("Failure message", { error });
    }
  },
};
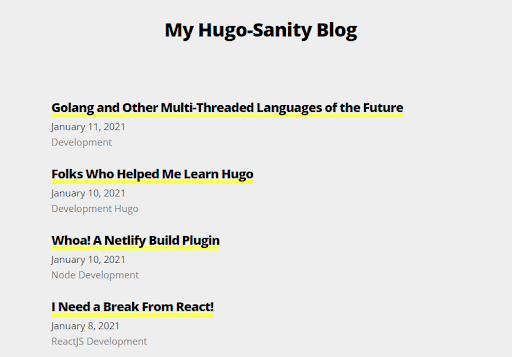
Run netlify build once more and keep your eyes peeled on the content folder. If all goes well, you should see it fill up with markdown files of your content!
Magical!
With our first big step done, let's push to our git repo and ensure the new code integrates with Netlify.
Delete the public folder, since we want that to be built for us at deploy time. Push your new commits and head over to app.netlify.com to watch it build.
Fantastic! You should now have a live Hugo site with your Sanity content-- but we are not done yet. To make this project truly shine, we'll need a way to rebuild the site from the Sanity studio. That way, publishing a new post is as quick as pressing a button from the dashboard. After the site is styled to your liking, you'll never have to revisit your Hugo code again.
This is also attainable with Sanity, thanks to the Netlify dashboard widget. Let's head back to the studio folder and install our dependencies.
cd ../studio
sanity install @sanity/dashboard
sanity install dashboard-widget-netlify
Then add the dashboard's configuration to the parts array in sanity.json.
//sanity.json
    //...
      "parts": [
    //...
      {
         "implements": "part:@sanity/dashboard/config",
         "path": "src/dashboardConfig.js"
       }
     ]
Create a folder in the studio root named src and a file within that named dashboardConfig.js.
//in src/dashboardConfig.js

export default {
    widgets: [
        {
        name: 'netlify',
        options: {
          title: 'My Netlify deploys',
          sites: [
            {
              title: 'My Hugo Sanity Website',
              apiId: 'YOUR_API_ID',
              buildHookId: 'YOUR_BUILDHOOK_ID',
              name: 'NETLIFY_SITENAME'
            }
          ]
        }
      }
    ]
}
Our API ID can be found in "Site Settings > General > Site Details > Site Information" on Netlify. A Build Hook ID can be generated in "Site Settings > Build and Deploy > Build Hooks > Add build hook". Give it a name and hit save, then copy the ID immediately after build_hooks/. The name will be the random string generated by Netlify (passionate-tomato-33sdfs, etc.).
When we run sanity start within our studio folder, we should see a shiny new dashboard where our Netlify button lives.
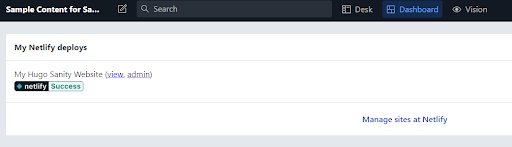
Run sanity deploy and go to your live studio. Let's see if it works.
Test the widget out by writing a quick blog post and publishing, then pressing the deploy button on the dashboard.
If all goes well, Netlify will run the prebuild script before Hugo starts-- it wipes the content folder, creates markdown files with the fresh data in Sanity, and compiles those files in Hugo. Your new post should be live!
Congratulations, you now have a super blog! Enjoy all the benefits of Sanity's slick, customizable approach to content management, coupled with the simplicity of the world's fastest static site generator.
There are plenty of ways to take this integration further. You could publish the plugin to npm, try adding a featured image, or even wire up the same dataset to another framework and compare the build times. Enjoy!
Sanity.io is a platform to build websites and applications. It comes with great APIs that let you treat content like data. Give your team exactly what they need to edit and publish their content with the customizable Sanity Studio. Get real-time collaboration out of the box. Sanity.io comes with a hosted datastore for JSON documents, query languages like GROQ and GraphQL, CDNs, on-demand asset transformations, presentation agnostic rich text, plugins, and much more.
Don't compromise on developer experience. Join thousands of developers and trusted companies and power your content with Sanity.io. Free to get started, pay-as-you-go on all plans.
Sanity Composable Content Cloud is the headless CMS that gives you (and your team) a content backend to drive websites and applications with modern tooling. It offers a real-time editing environment for content creators that’s easy to configure but designed to be customized with JavaScript and React when needed. With the hosted document store, you query content freely and easily integrate with any framework or data source to distribute and enrich content.
Sanity scales from weekend projects to enterprise needs and is used by companies like Puma, AT&T, Burger King, Tata, and Figma.
This article will explore how to use SVG in React in three examples

Learn how to hook up a Telegram chatbot to Sanity using Node.js in this short, snappy tutorial.

Build a full-fledged, user-authenticated To-do app using Sanity, Next.js, and Magic.link.

In this tutorial, we'll make a no-frills "merch store" for a personal blog using the Stripe API, Next.js, and Sanity. We'll leverage Stripe's fantastic checkout platform to redirect our customers to Stripe's servers for their checkout process.